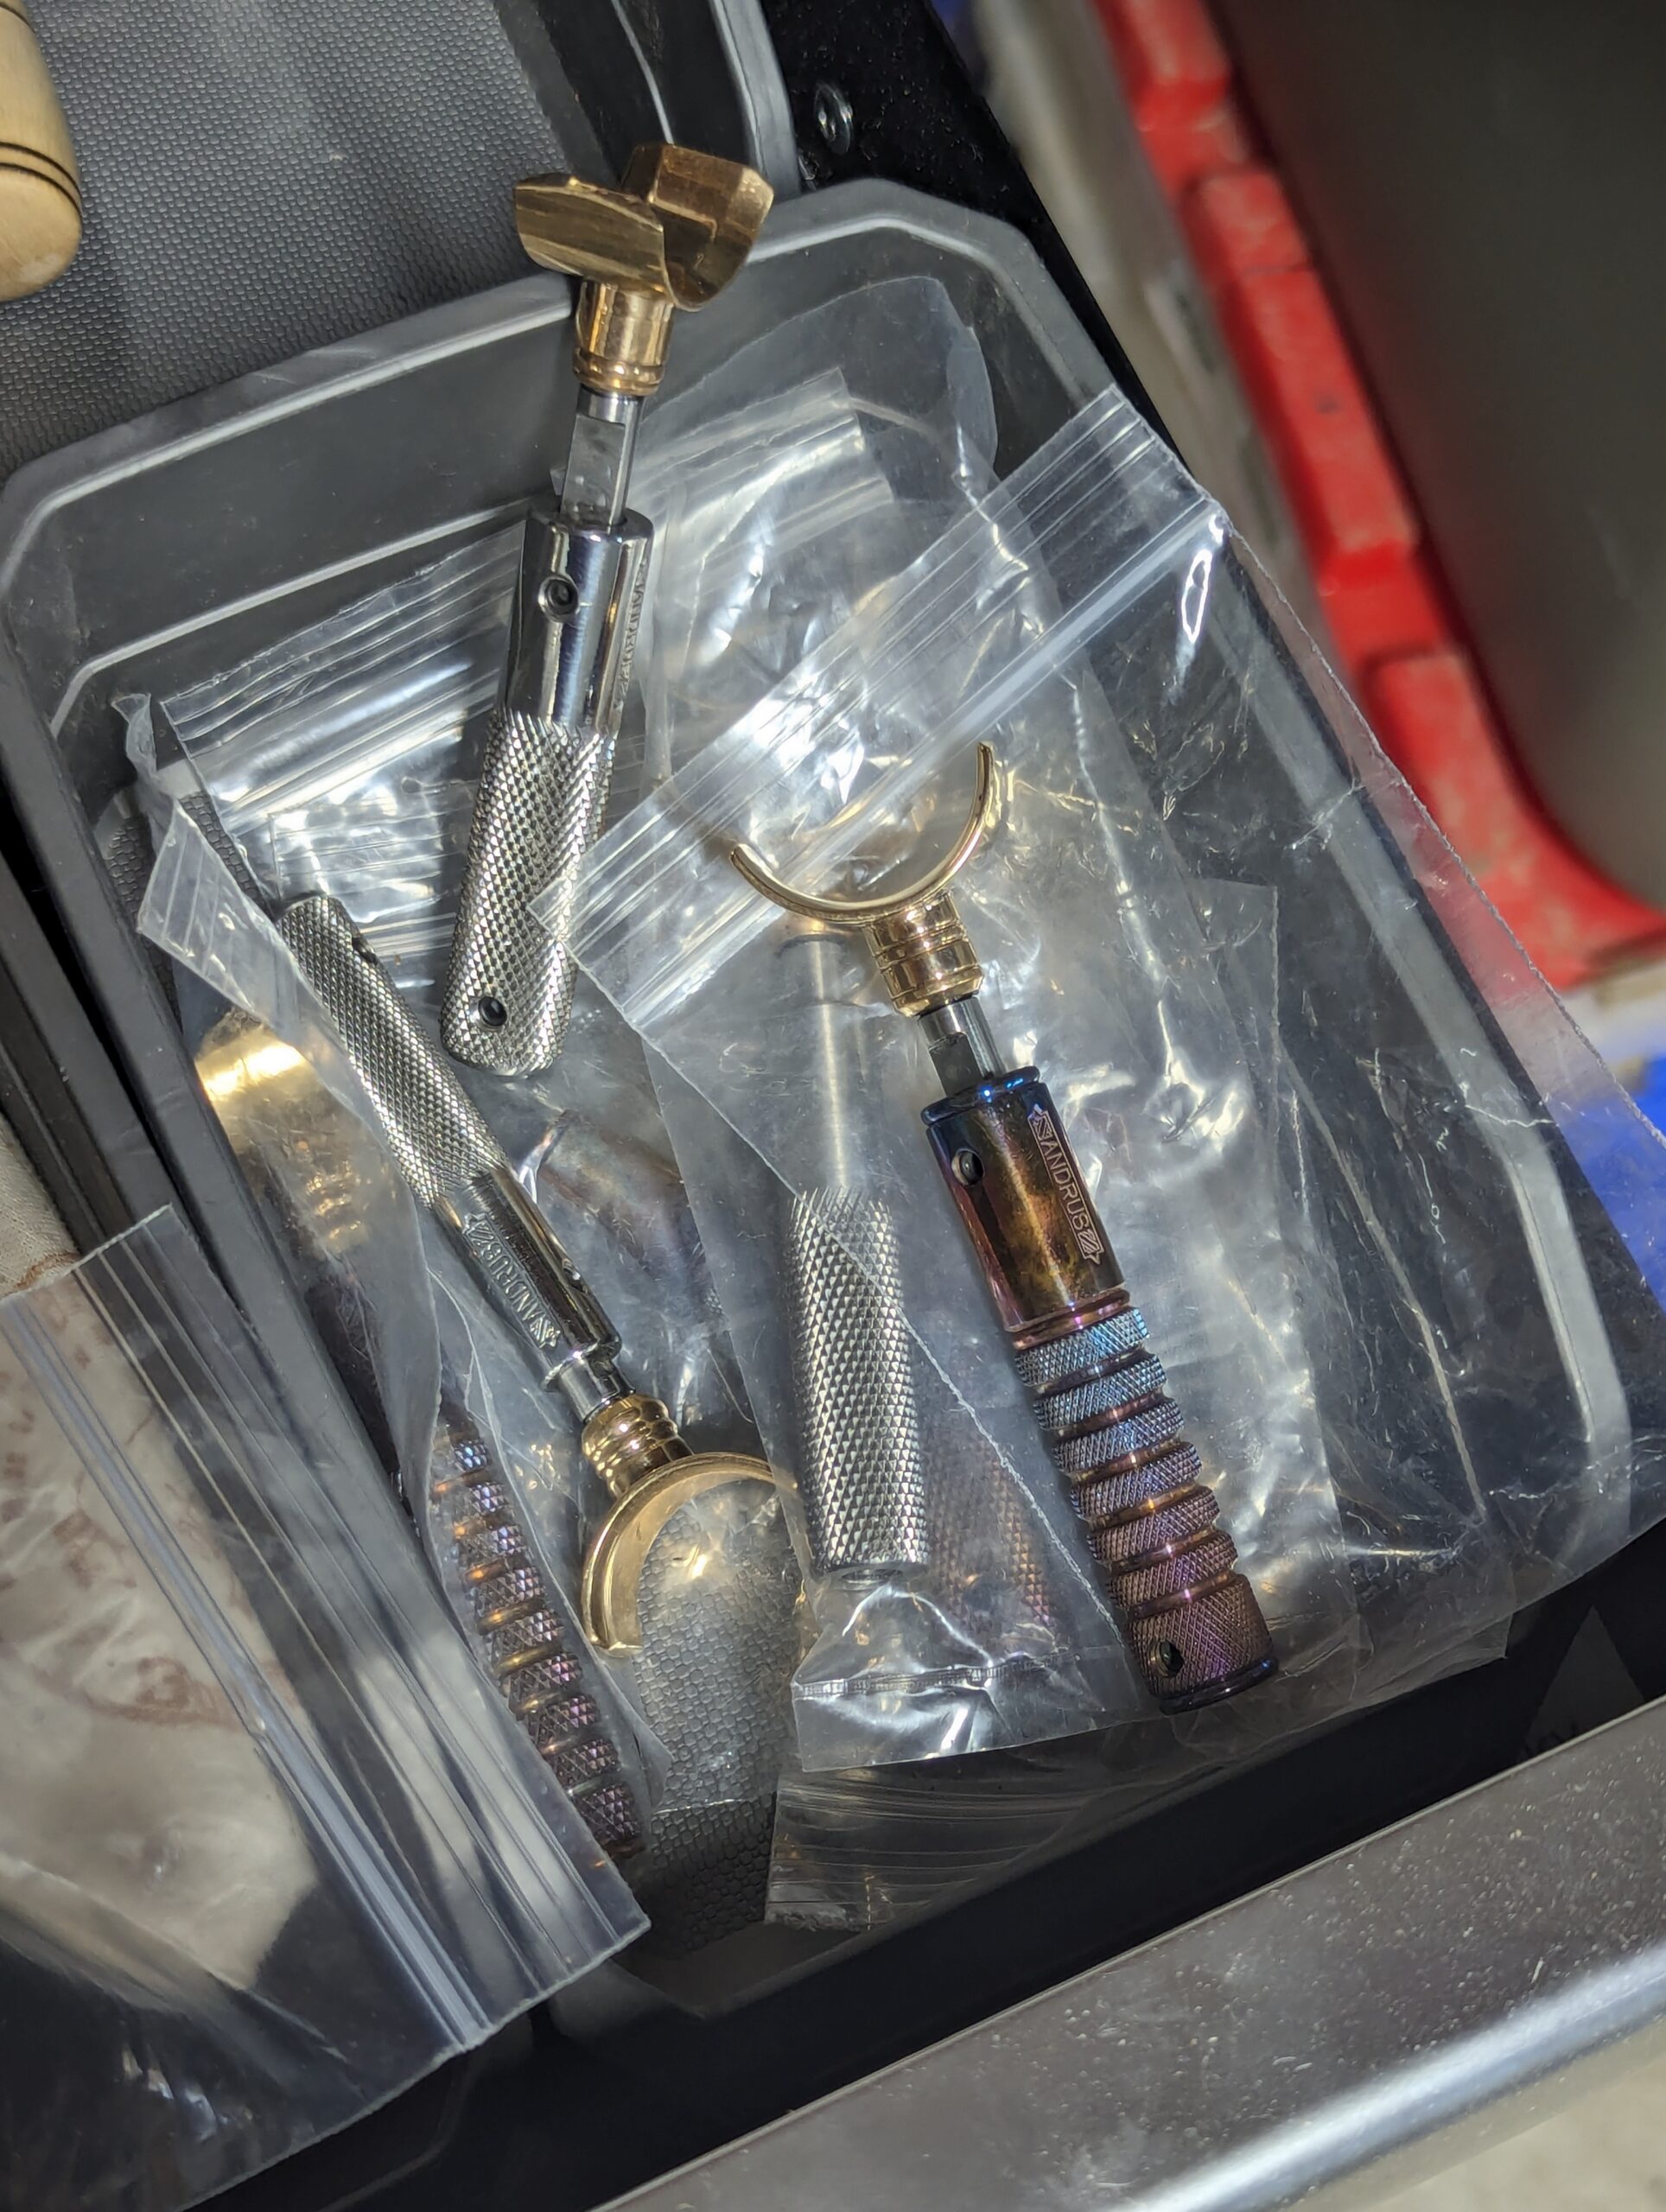
In Prescott last week I was able to have students at my stitching workshop try out the new Horseshoe Brand pricking irons. I’ll tell you, they perform admirably. The are sized stitches per inch (spi) like we in the U.S. are accustomed too. They are also narrow enough to fit right in a stitch groove. Collen also set me up with a new awl that they are carrying that matches the pricking irons in the profile of the blade. It also fits sweetly in your palm. Nice work Jeremiah, and Colleen. #horseshoebrandtools
Author: Gordon
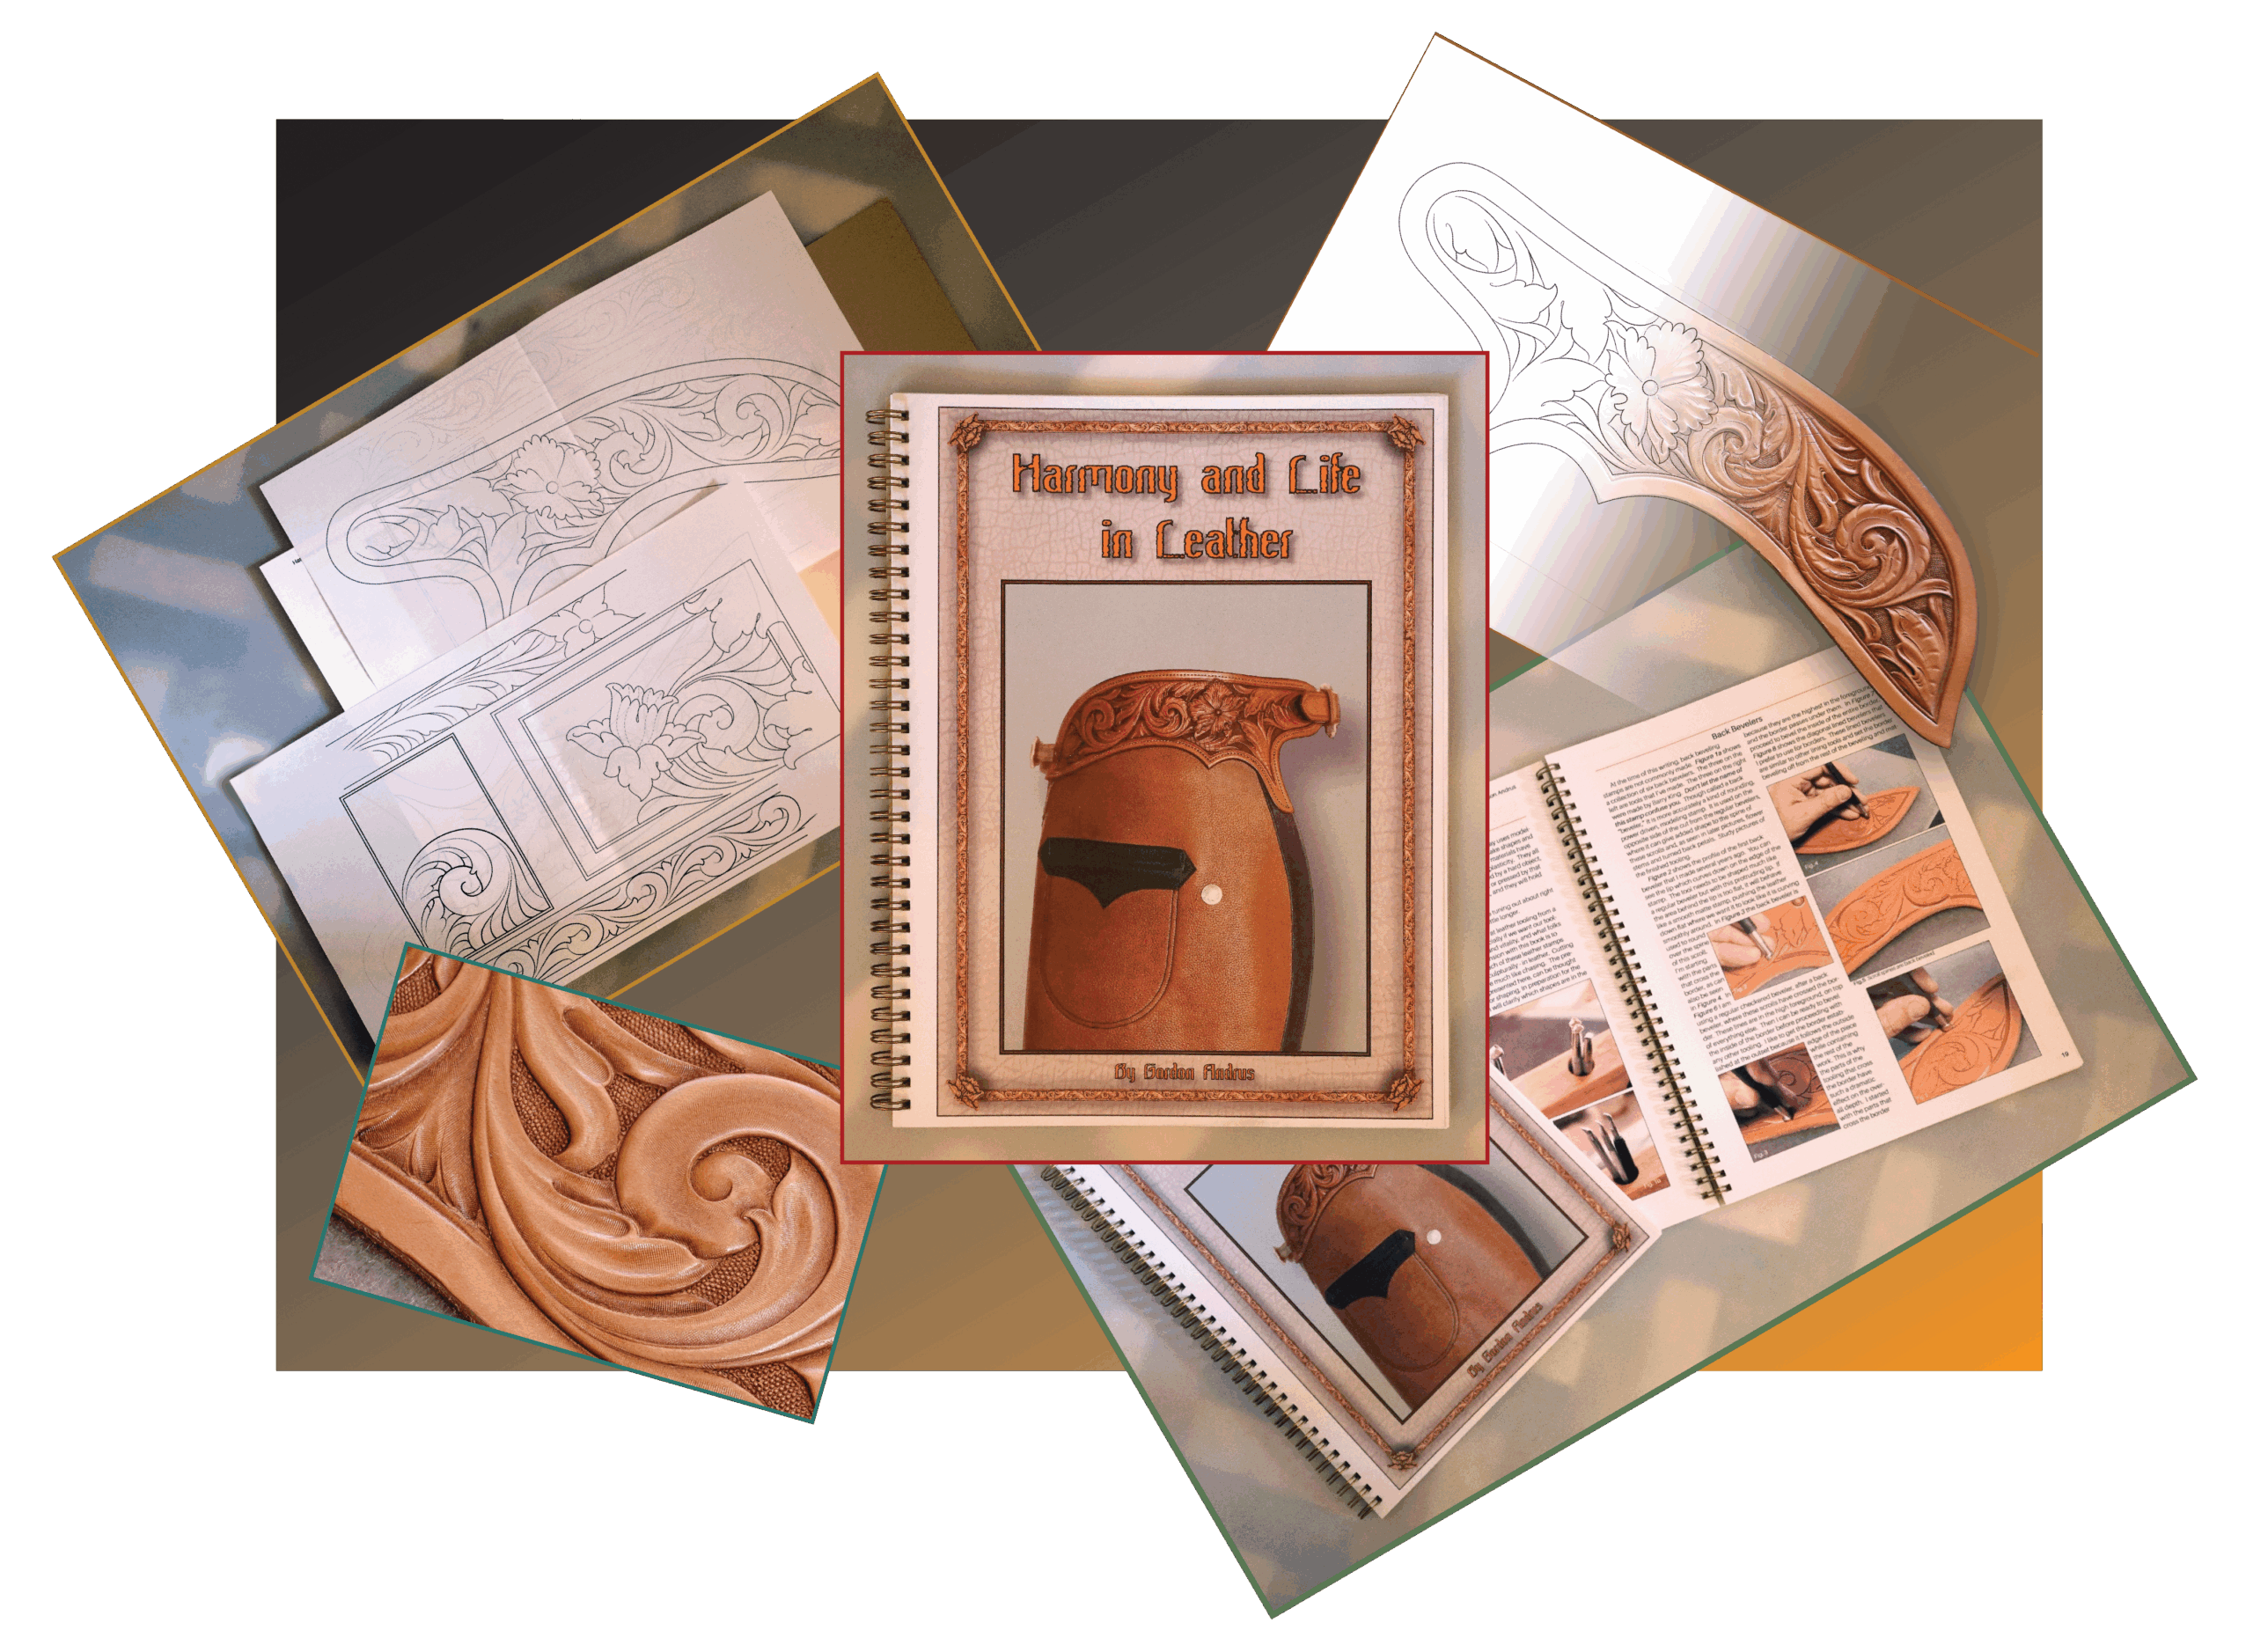
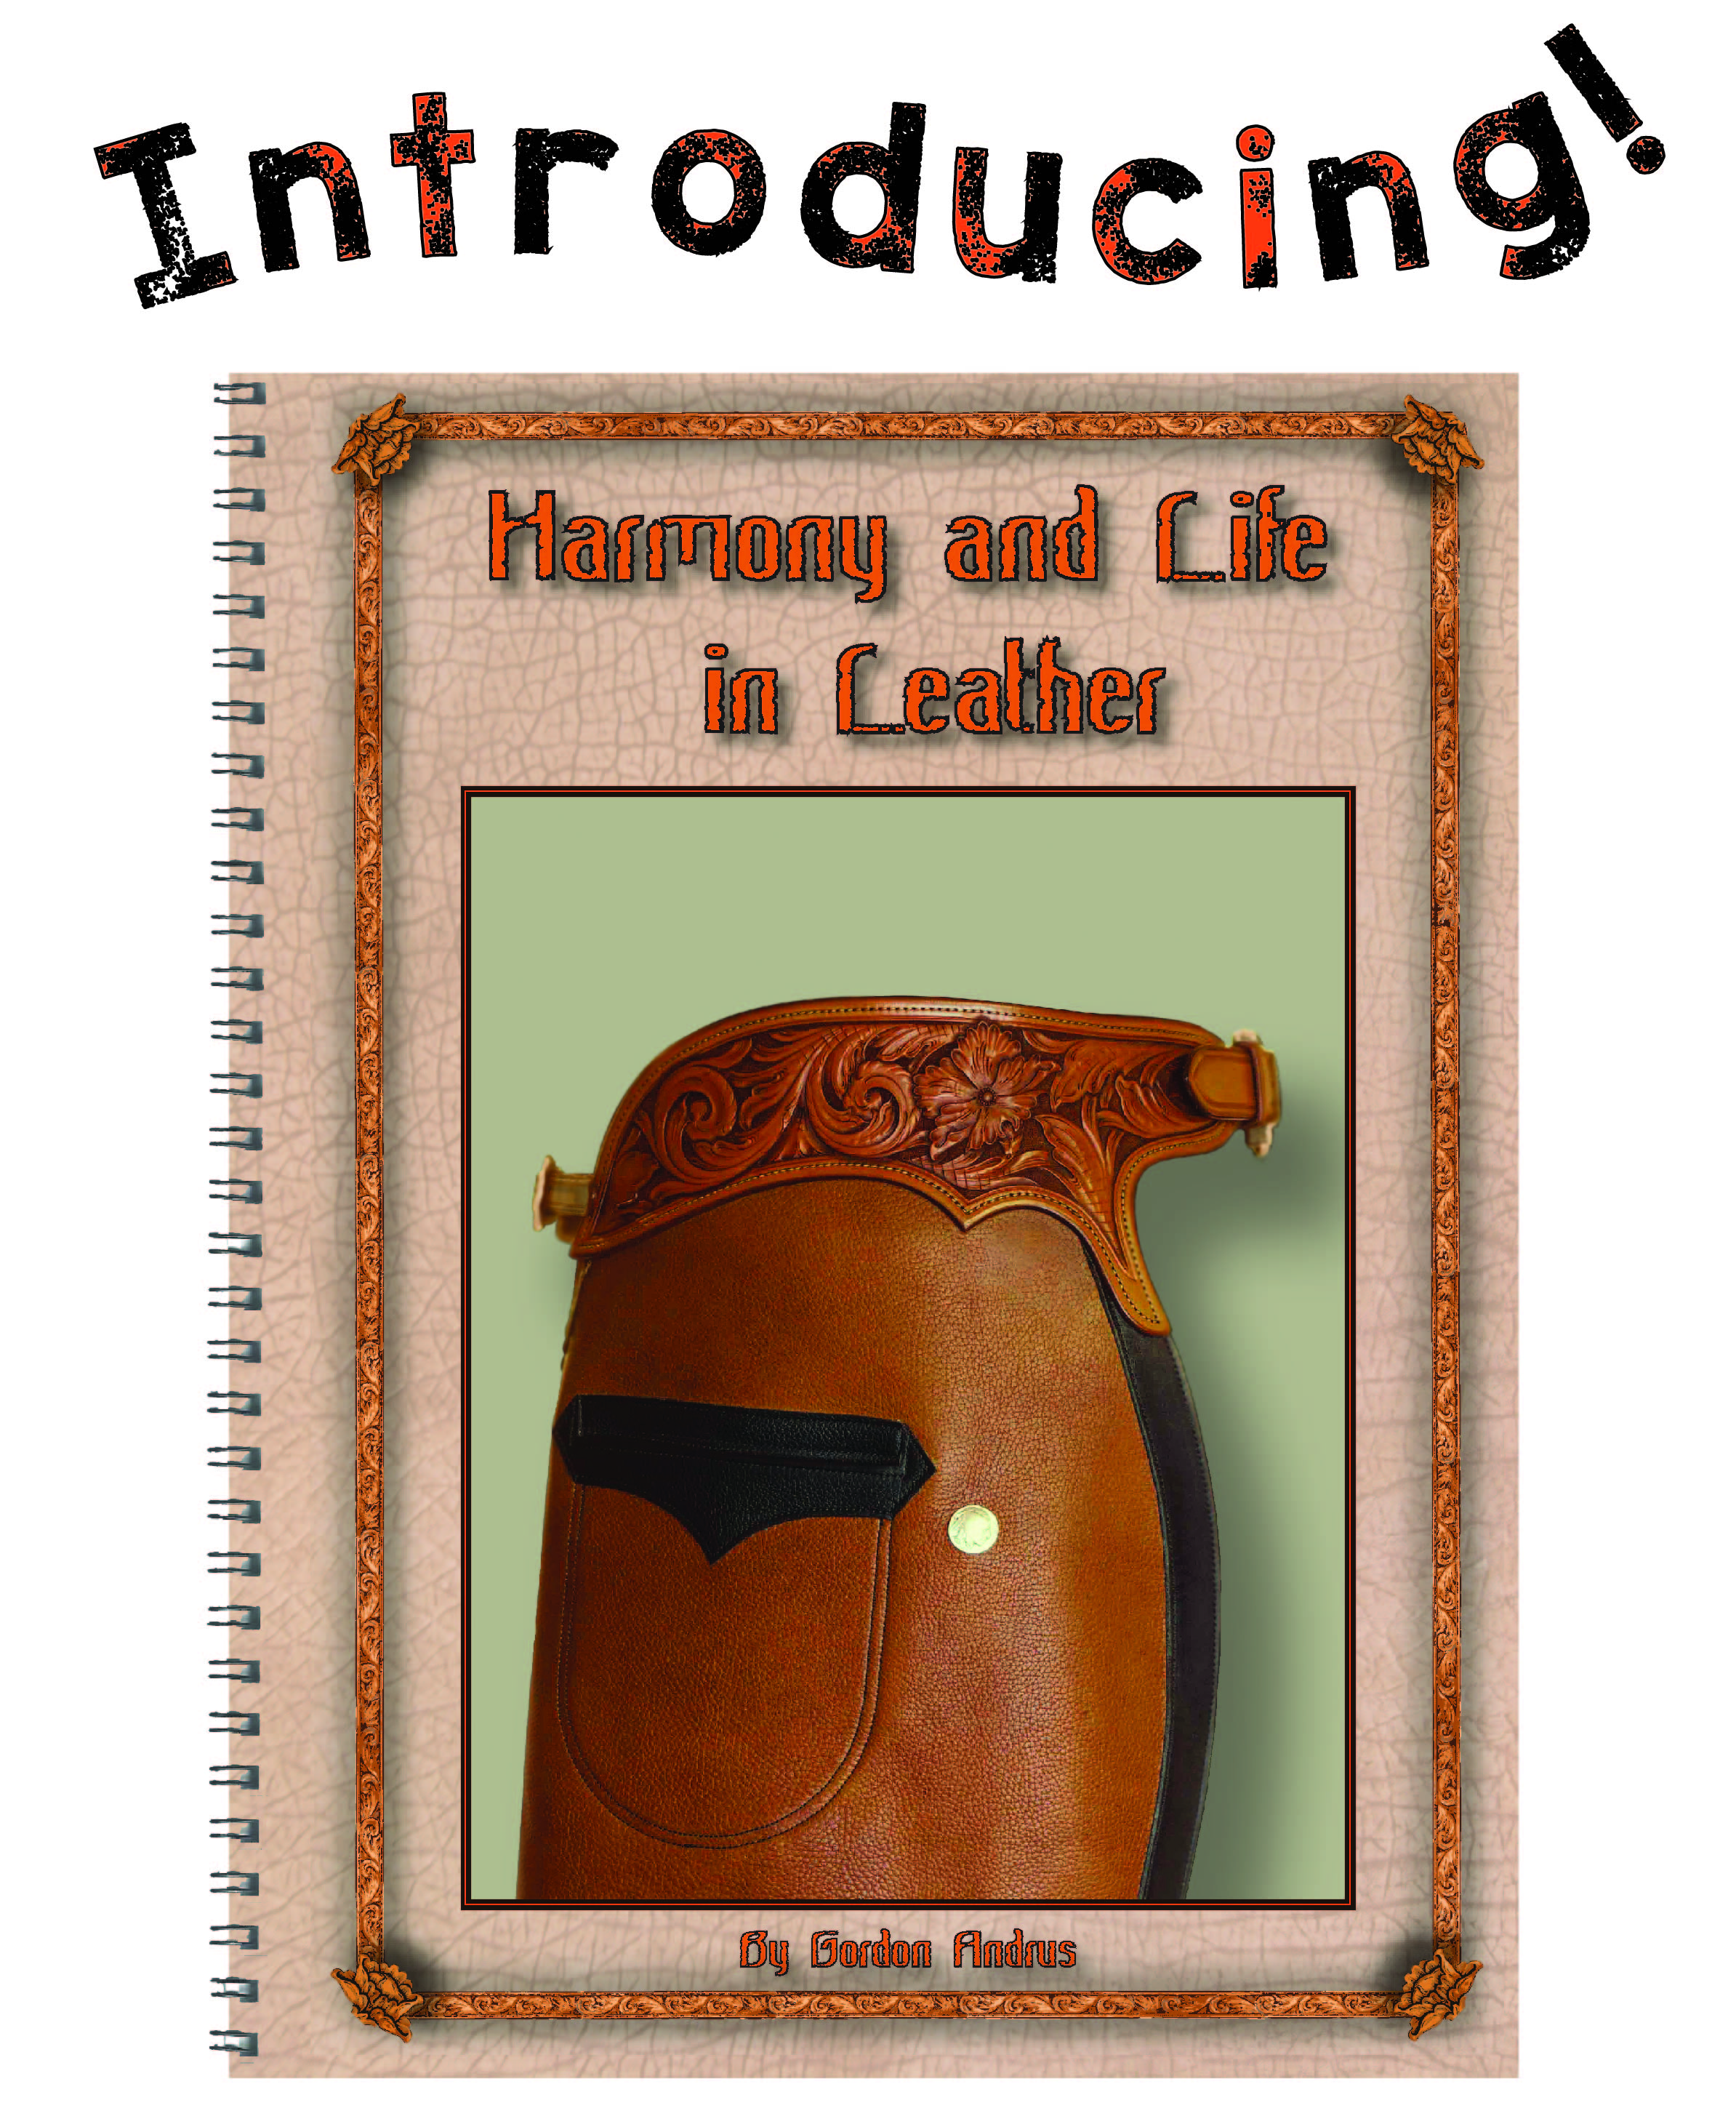 Well at long last I have this in print and available here at Red Ox Brand Tools. I’m pretty excited about this new book. It comes with several patterns to use with the techniques and concepts that are covered in depth throughout the book. It contains 220 illustrations, and presents a unique insight into the art of ornamental tooling in leather.
Please check it out here. https://redoxbrand.sagecreeksaddles.com/product/6467/
Upcoming Pendleton Show
The Pendleton Leather Show is right around the corner. I’m excited about the classes I have on offer this year. I’ve tweaked a few things and I think the classes will be fresh and better than ever.
We will be hand stitching with European style pricking irons and expanding our hand stitching to include box stitching. As always, my extensive handouts will be included with each workshop.
Visit Pendleton Leather Show to sign up for classes
You can see full descriptions of the classes here on the new Class Information and Tool List page. This page includes two illustrated tool lists for a solid start to your tool kits, including a source for the tools discussed in my new book.
I’ll also have the new book Harmony and Life in Leather available at the show.

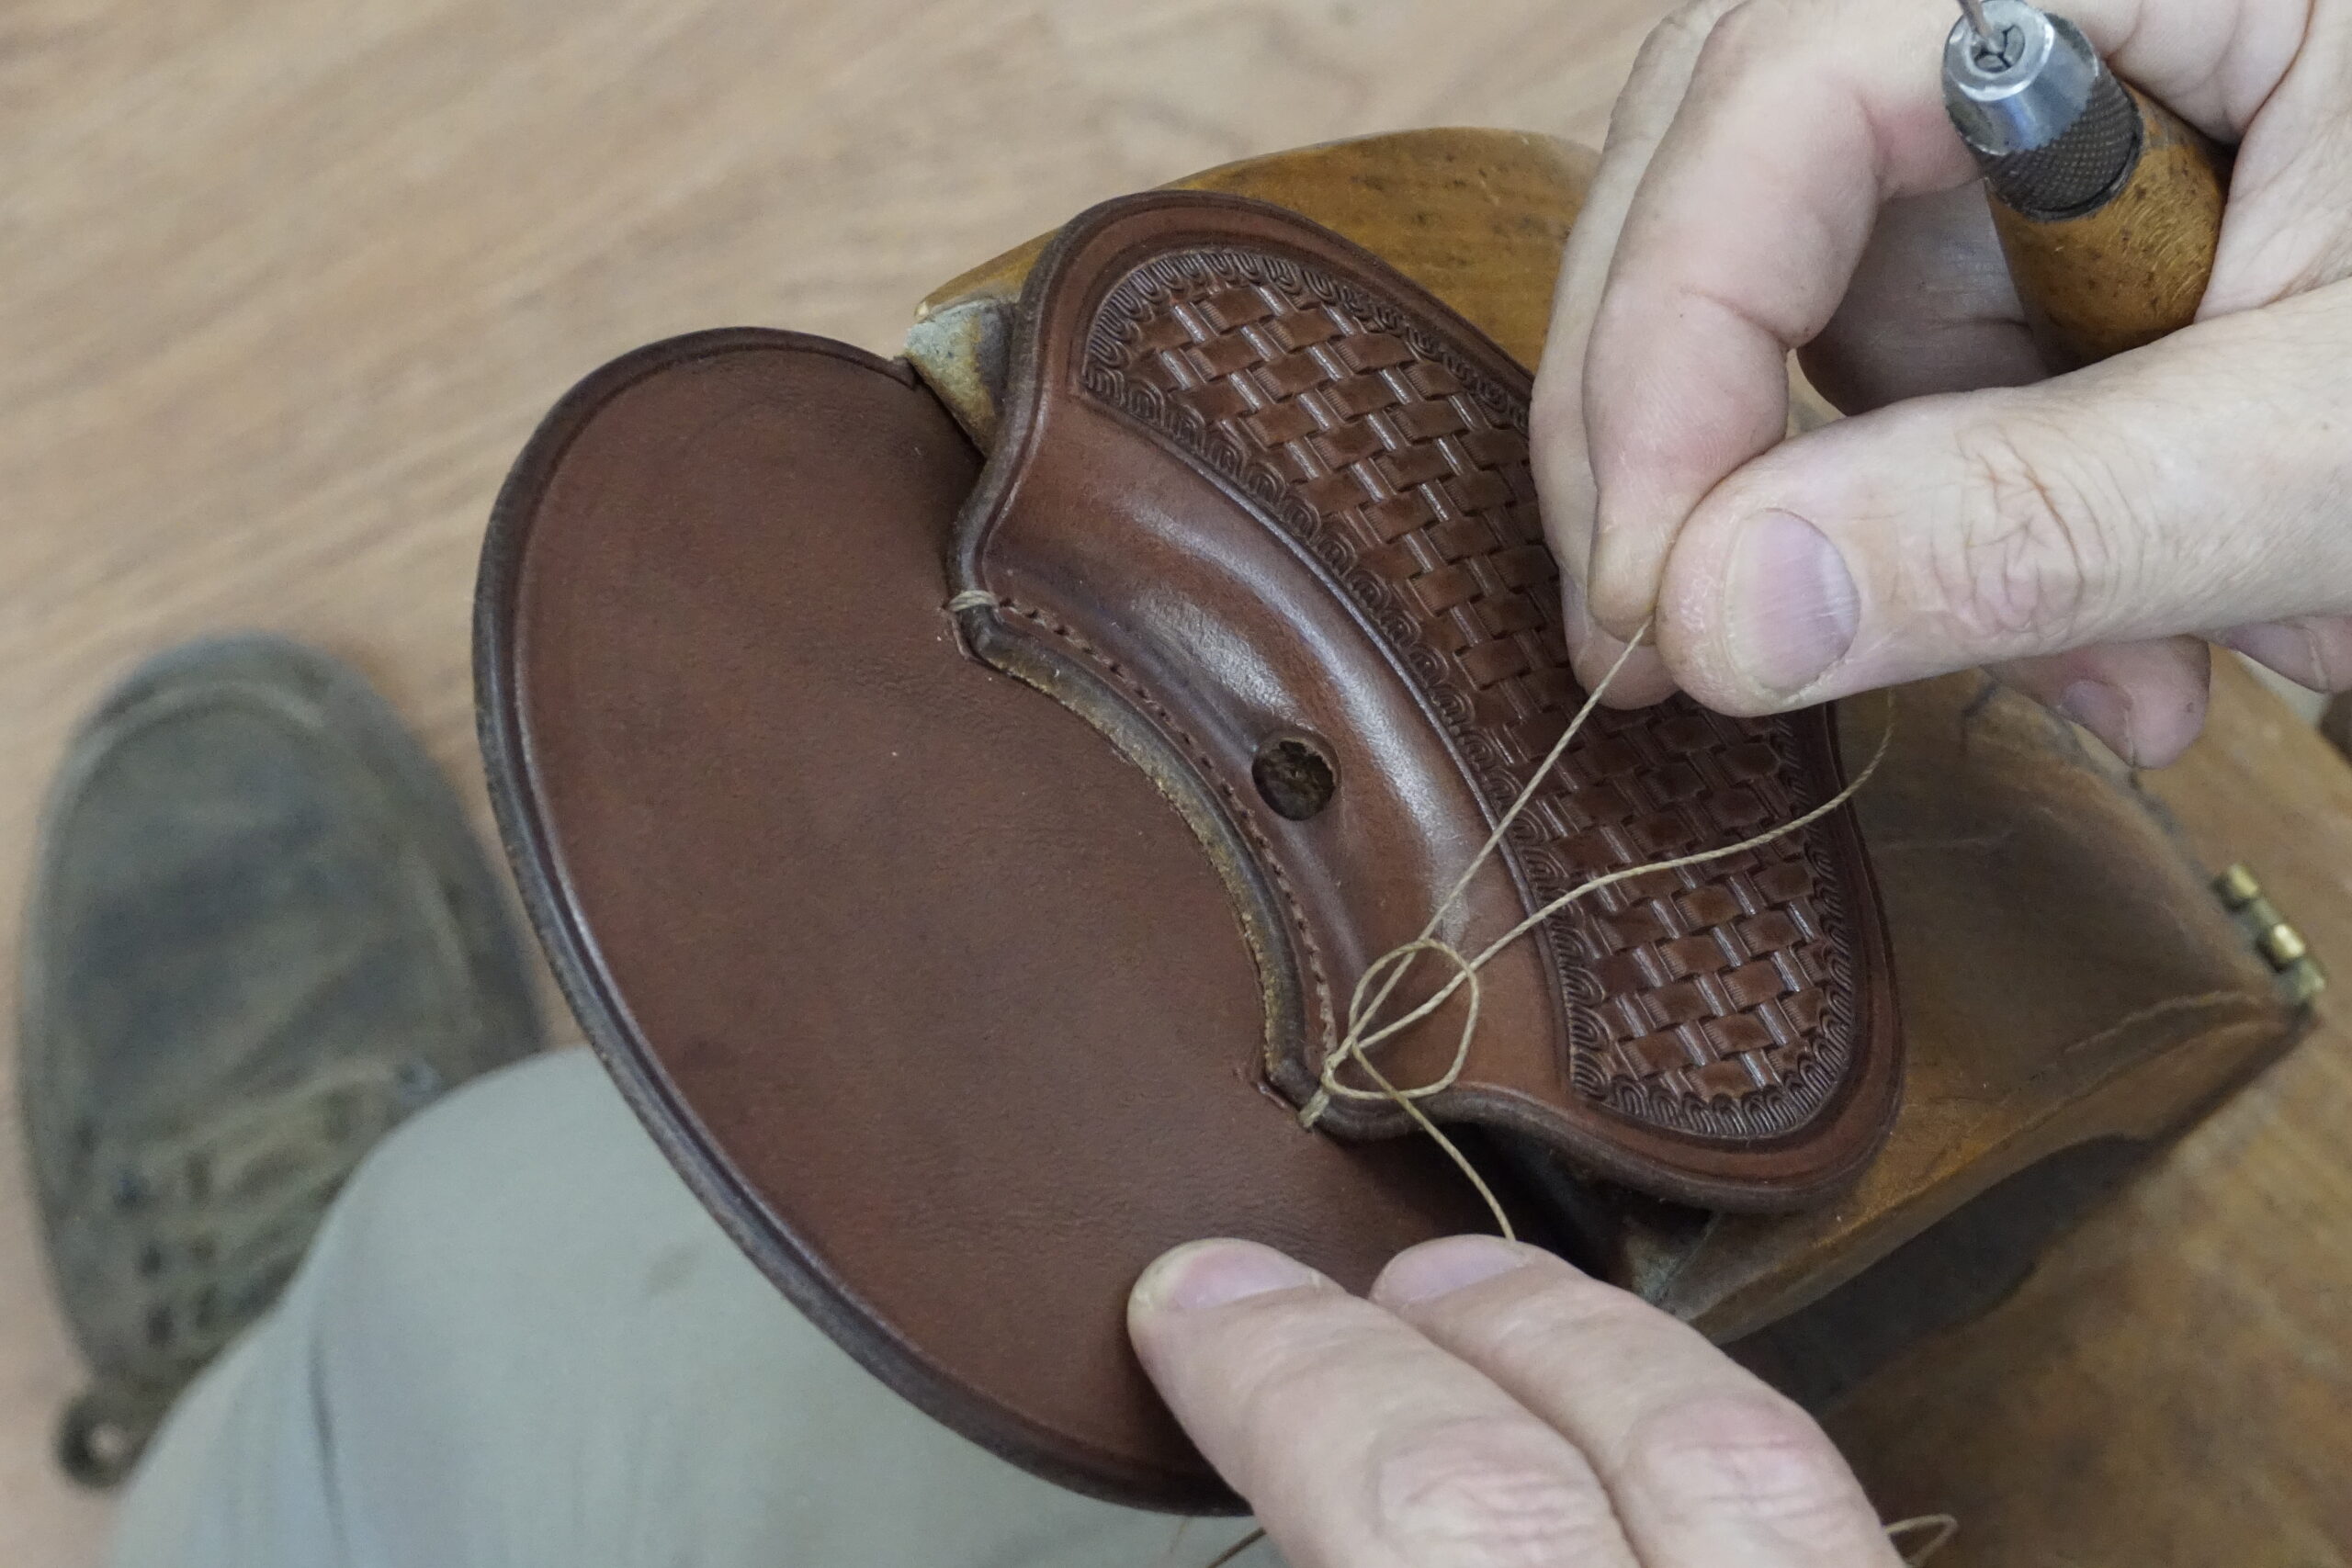
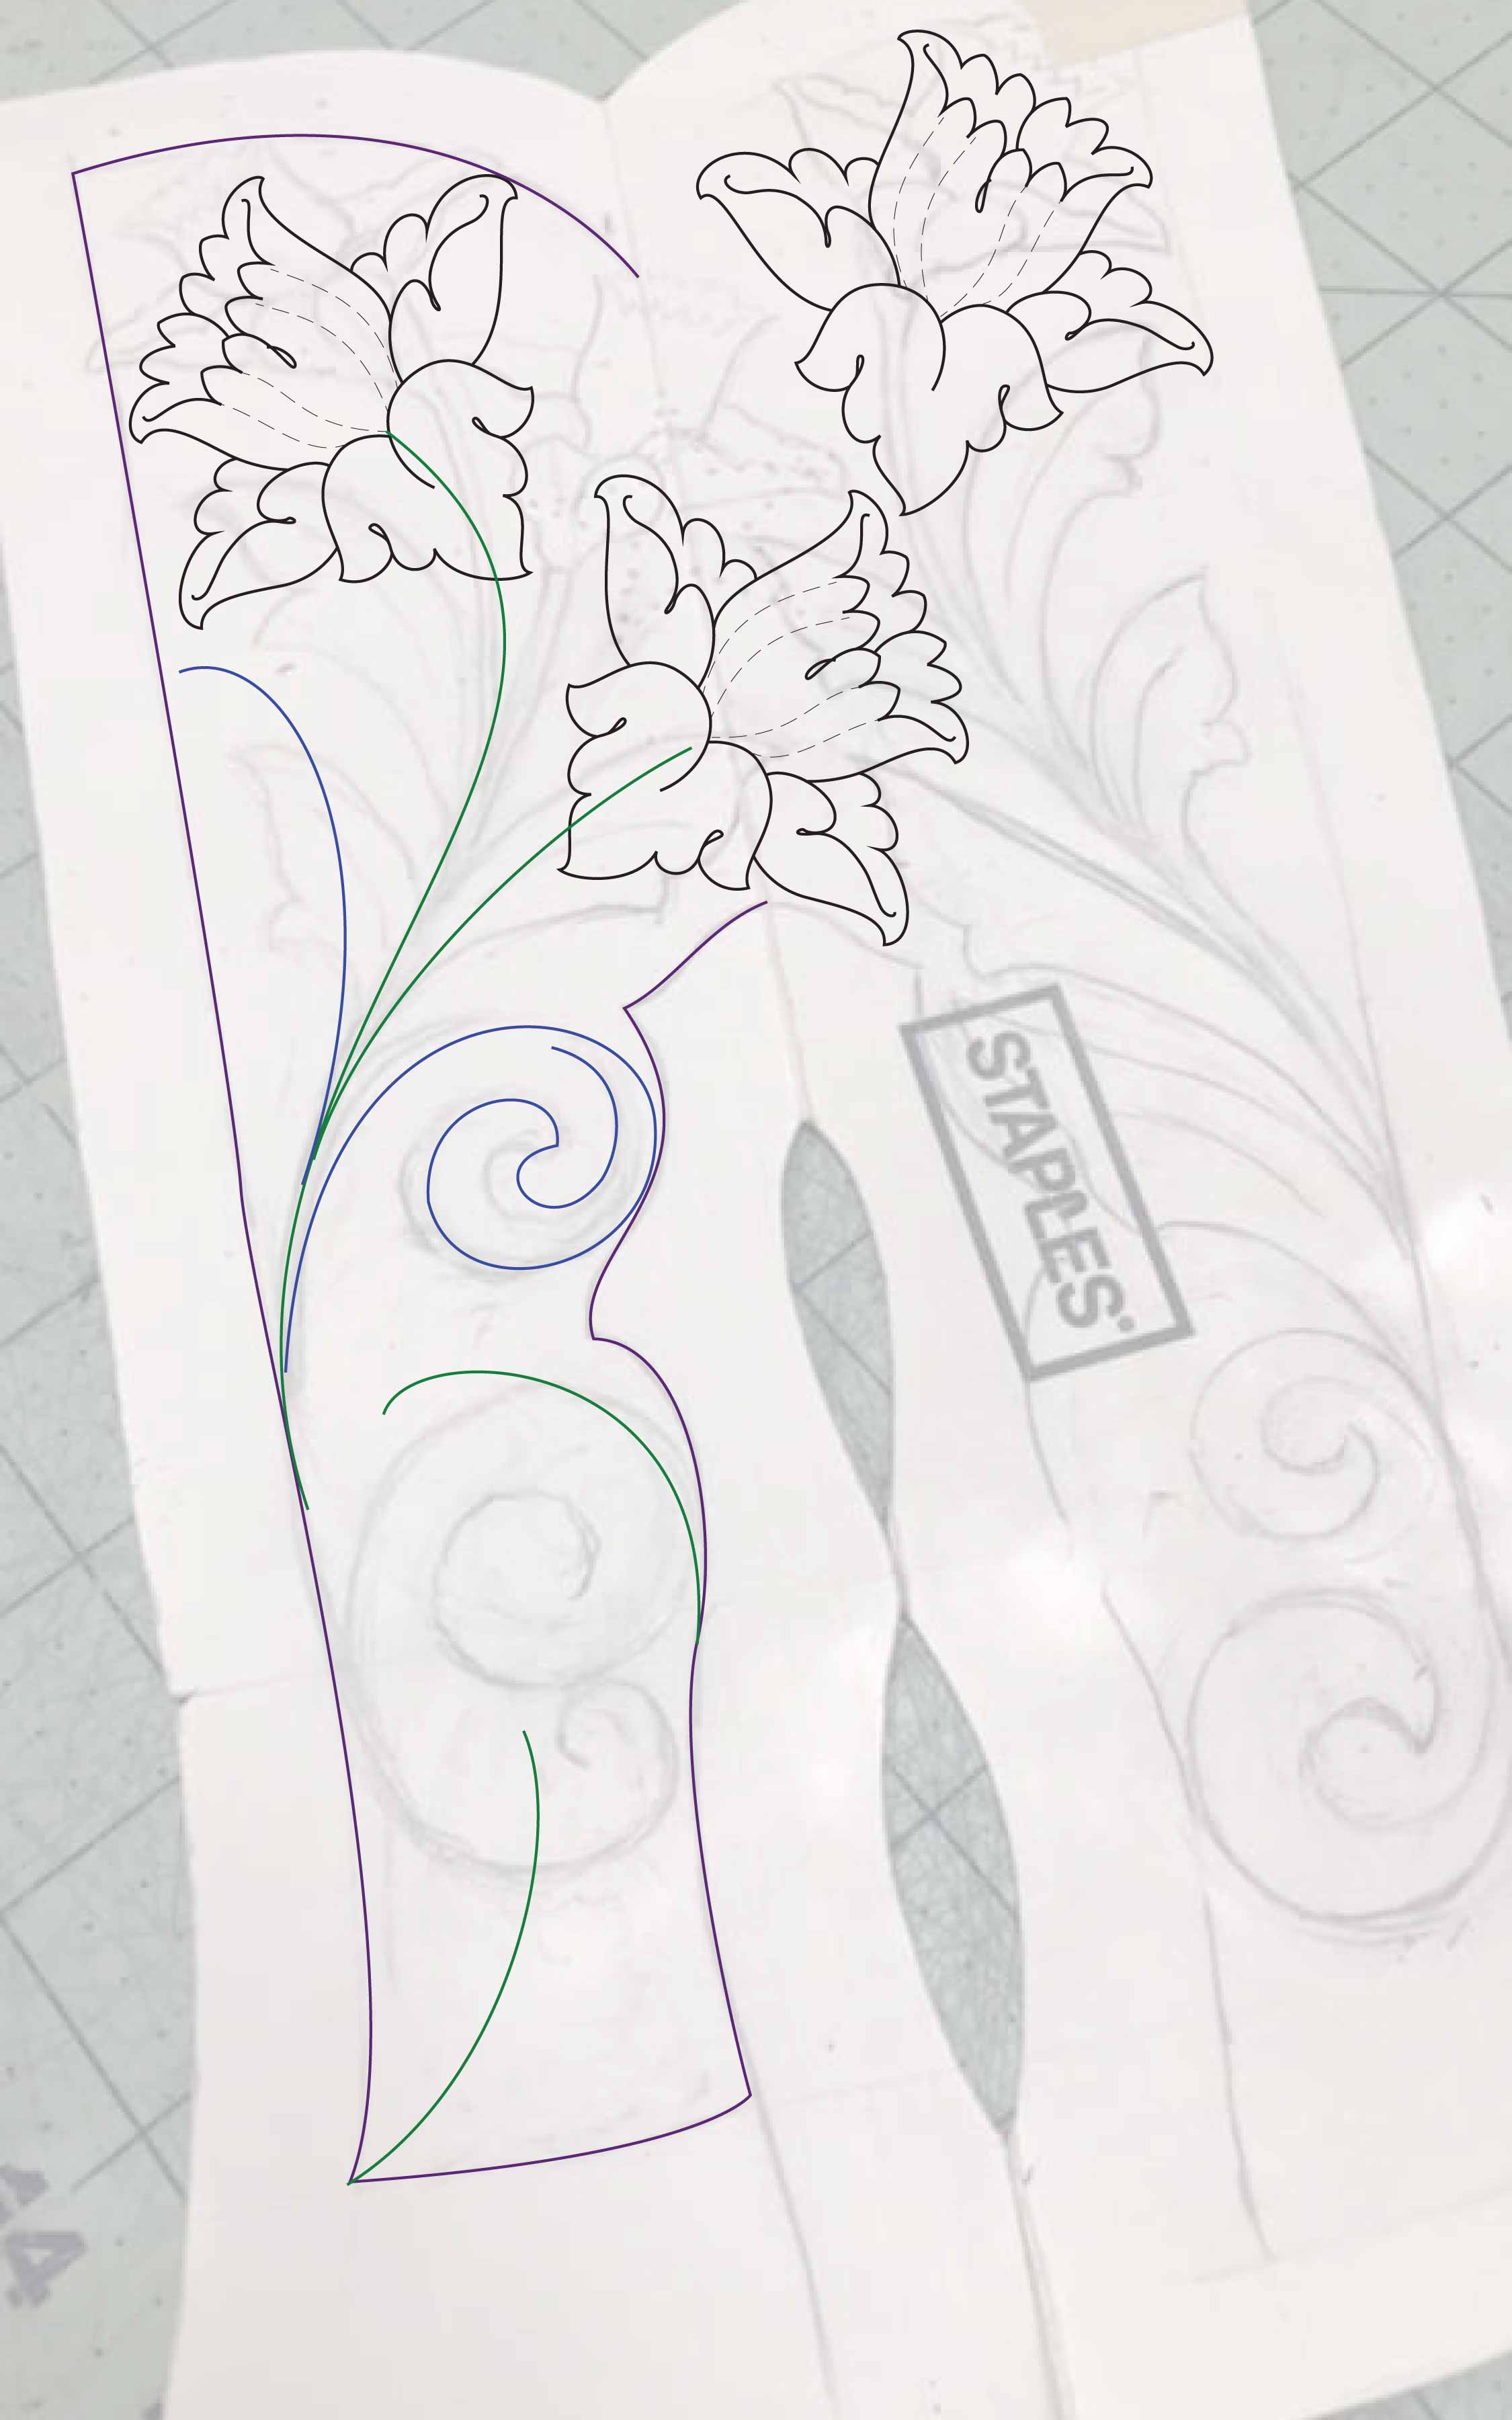
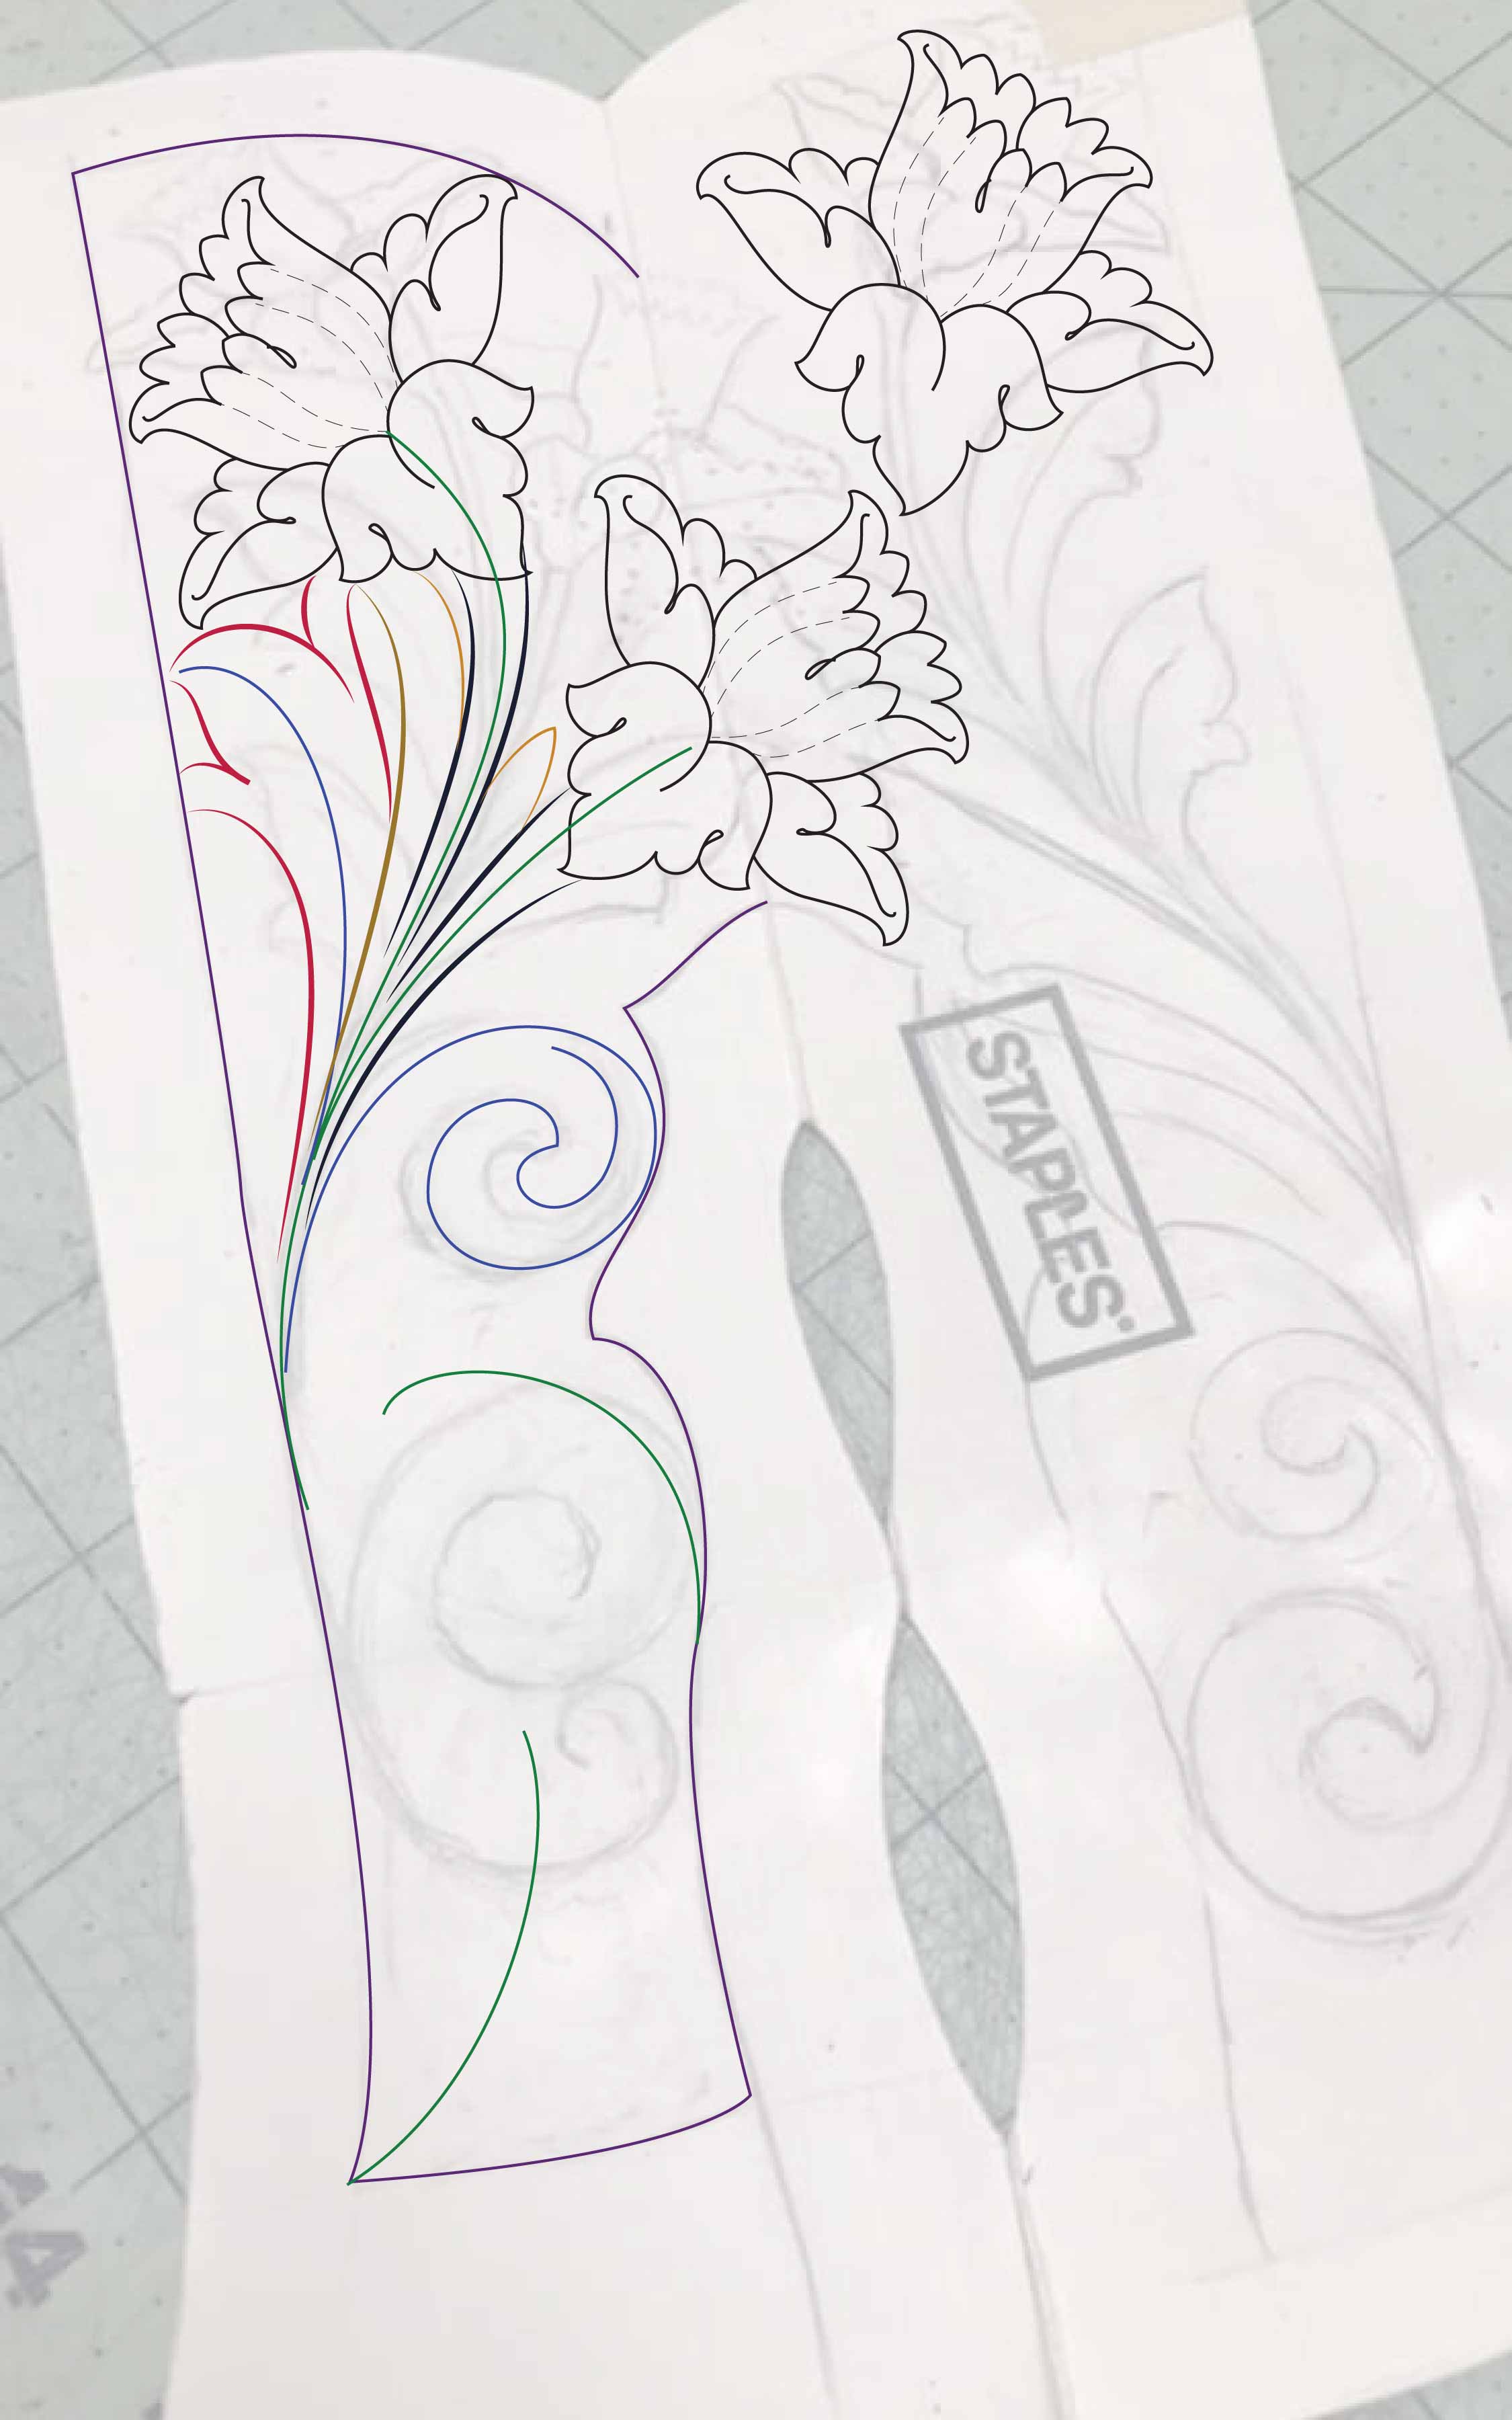
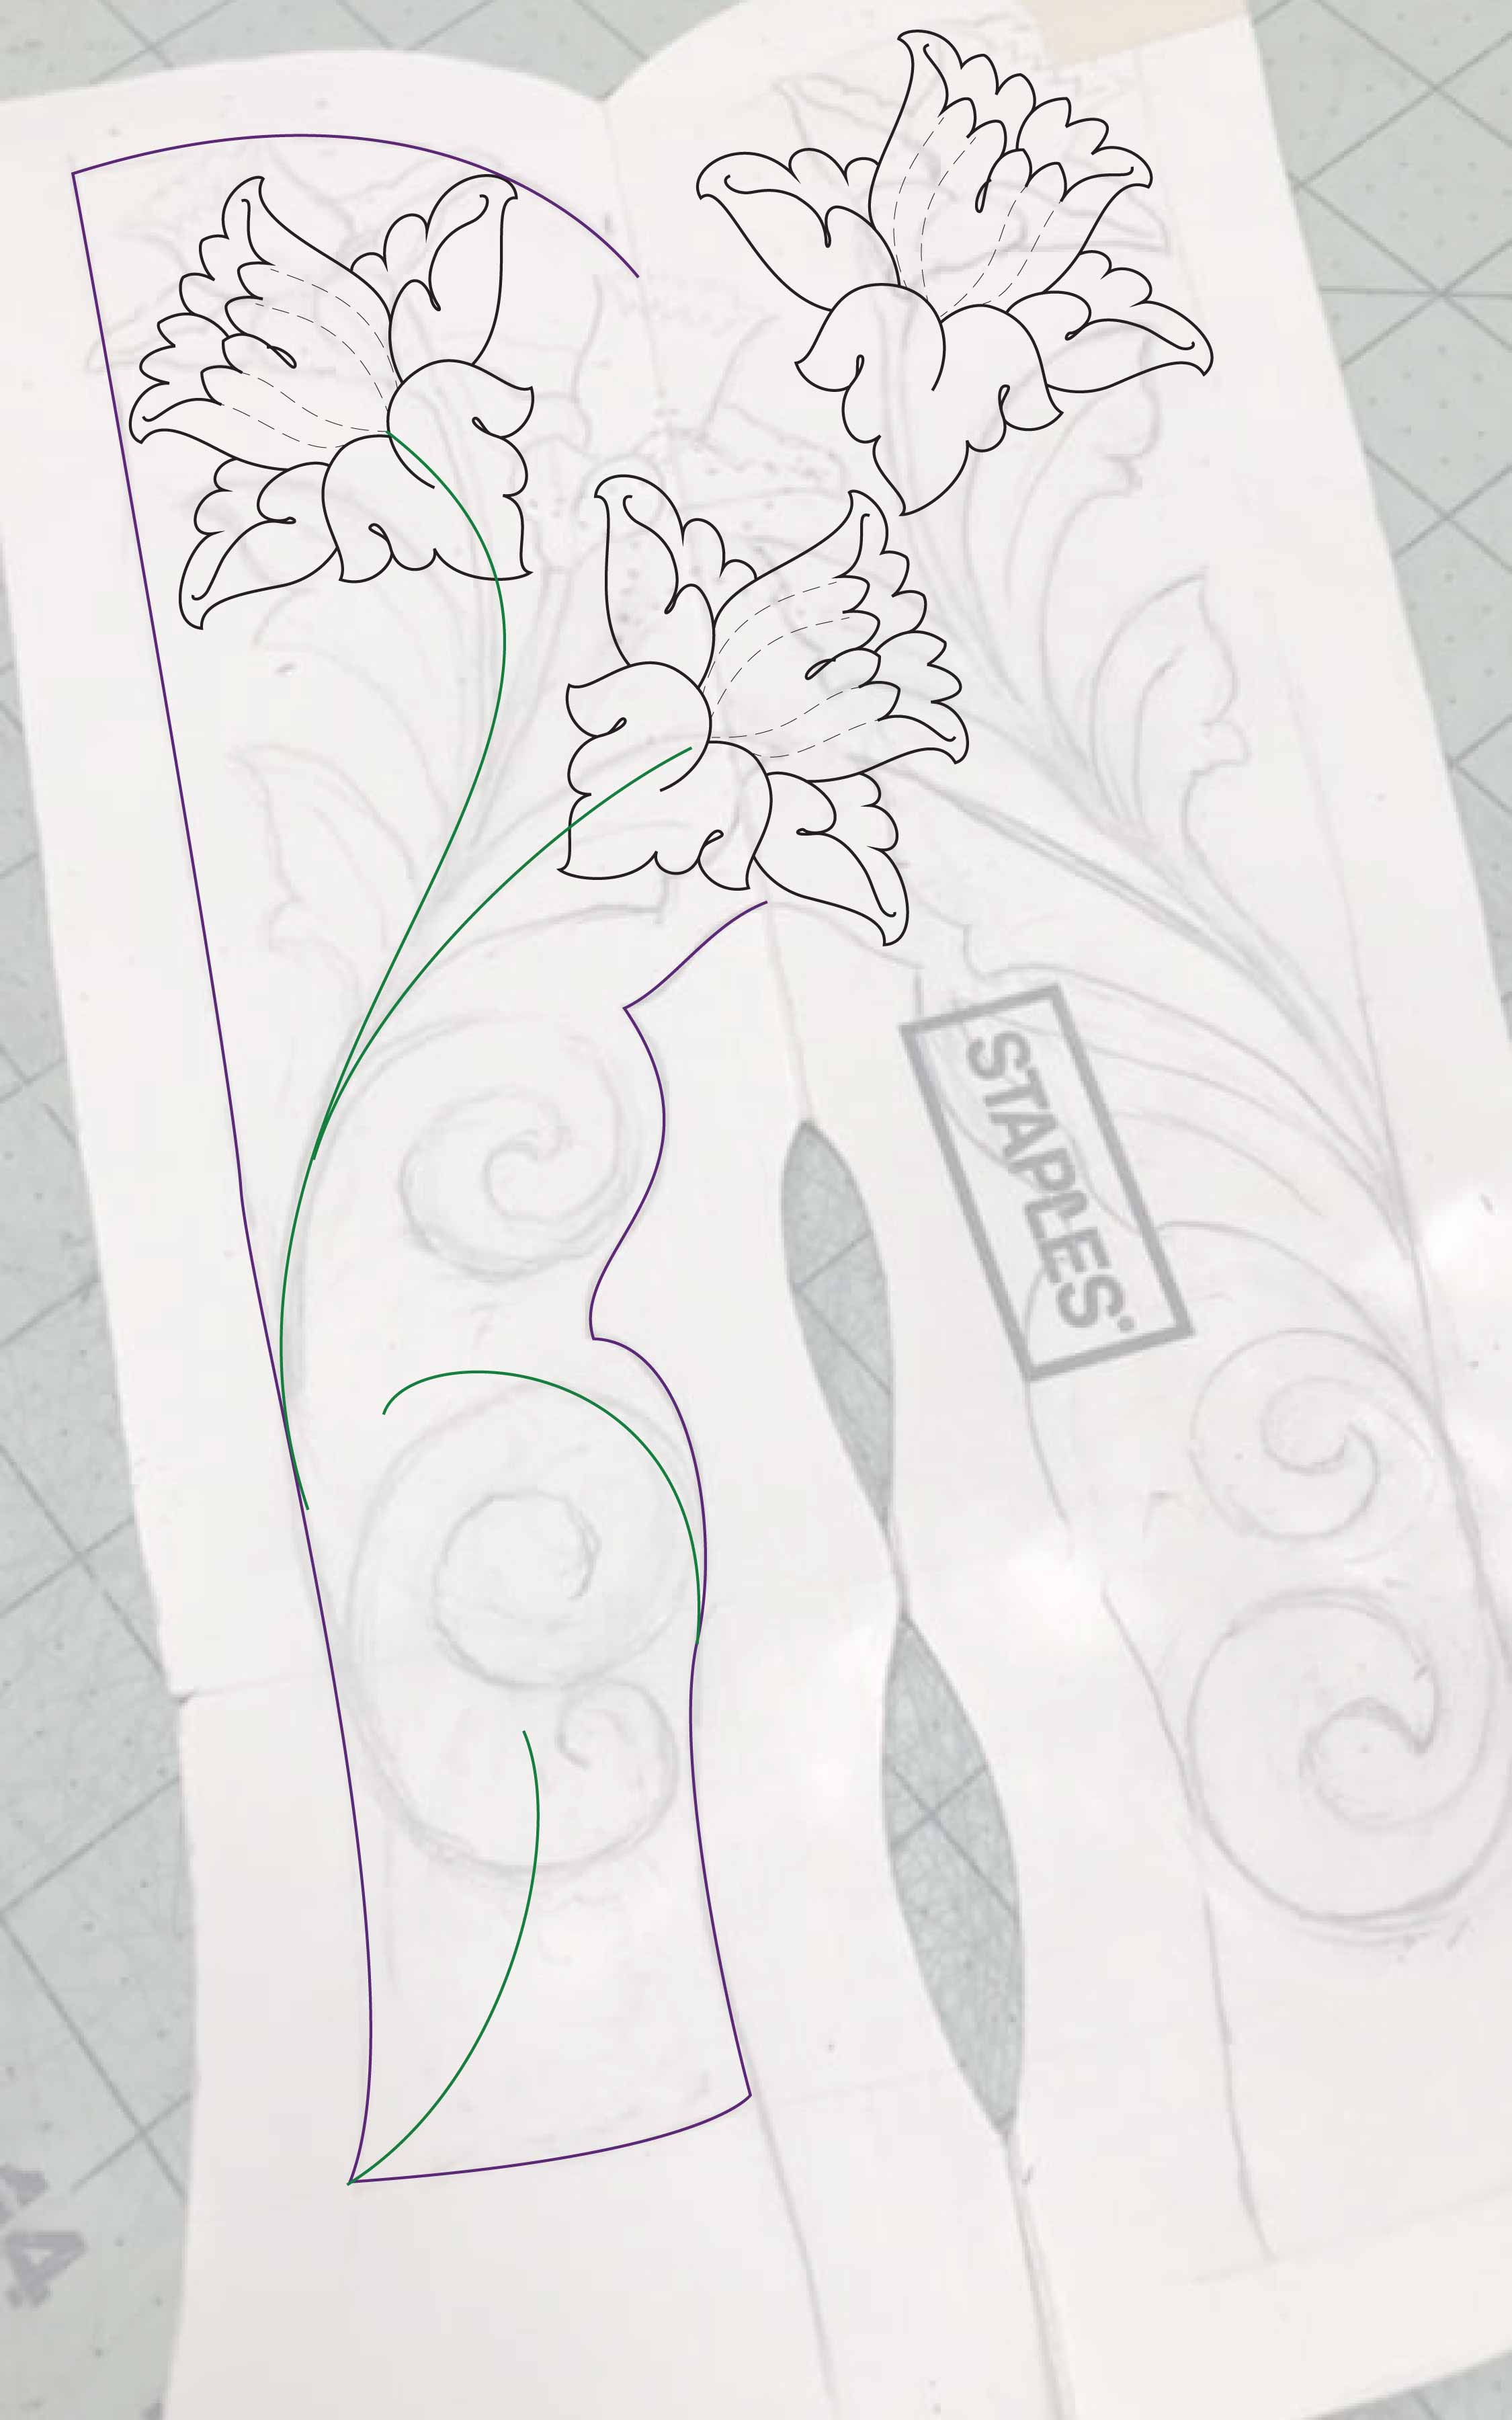
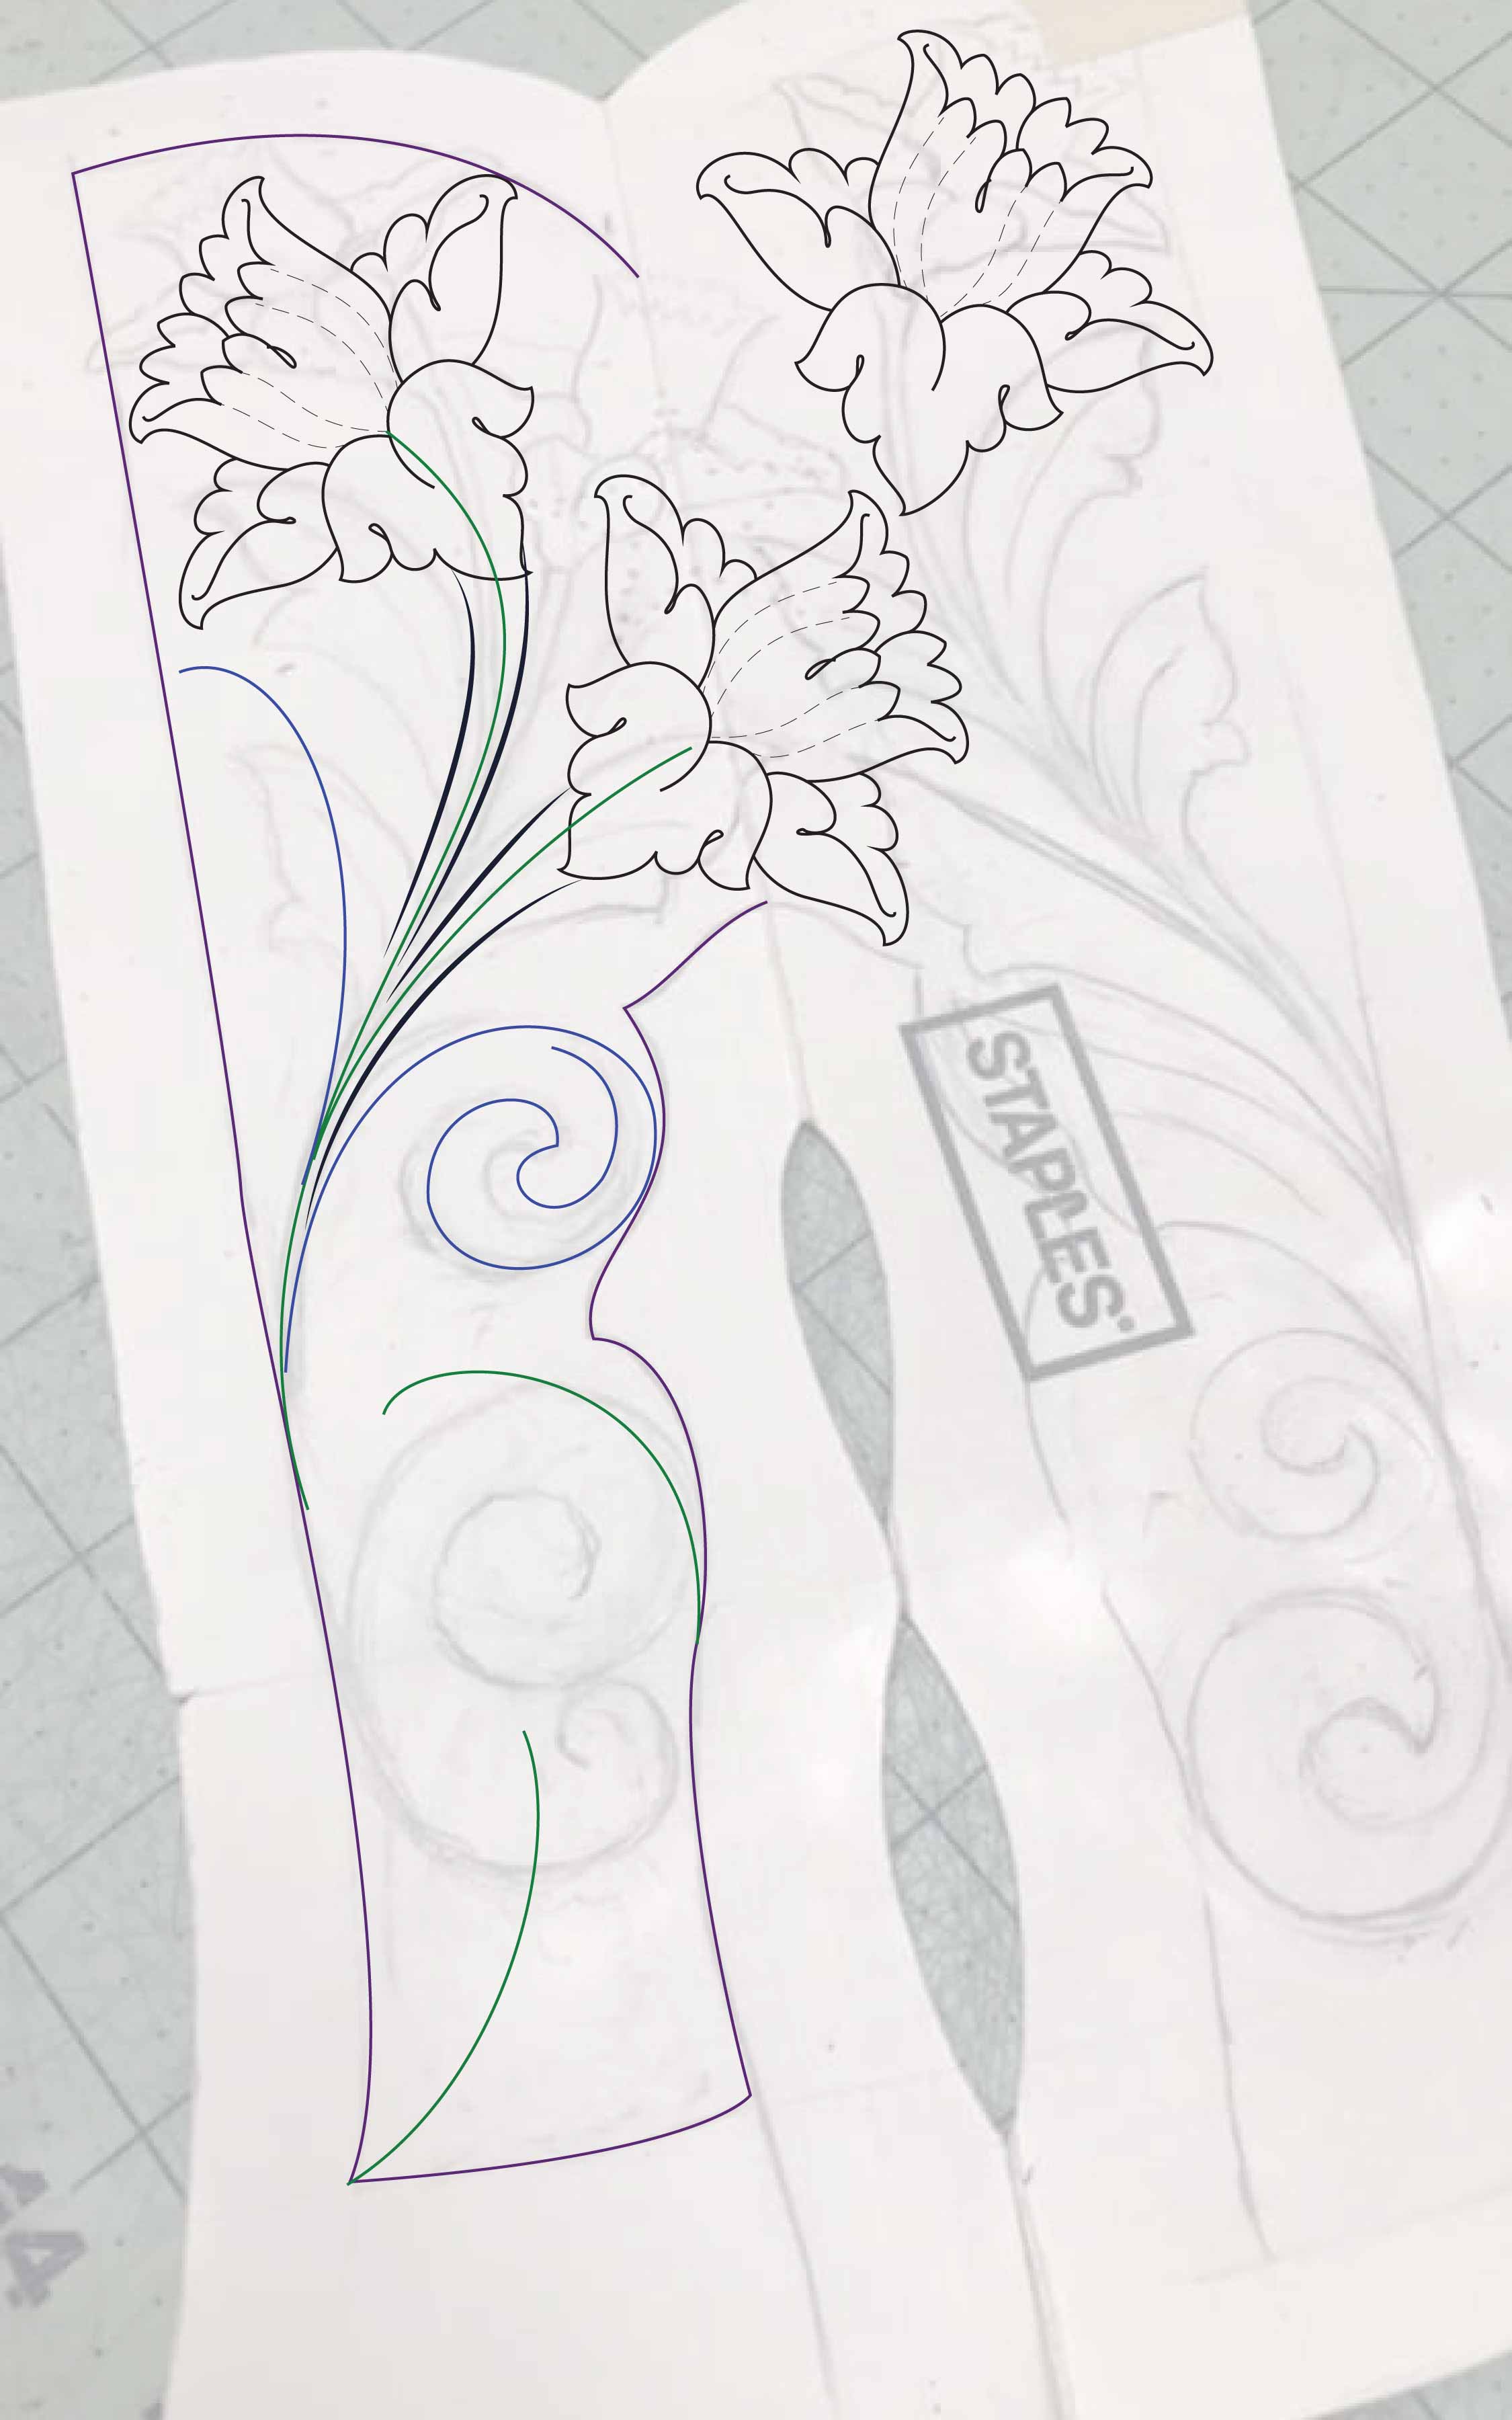
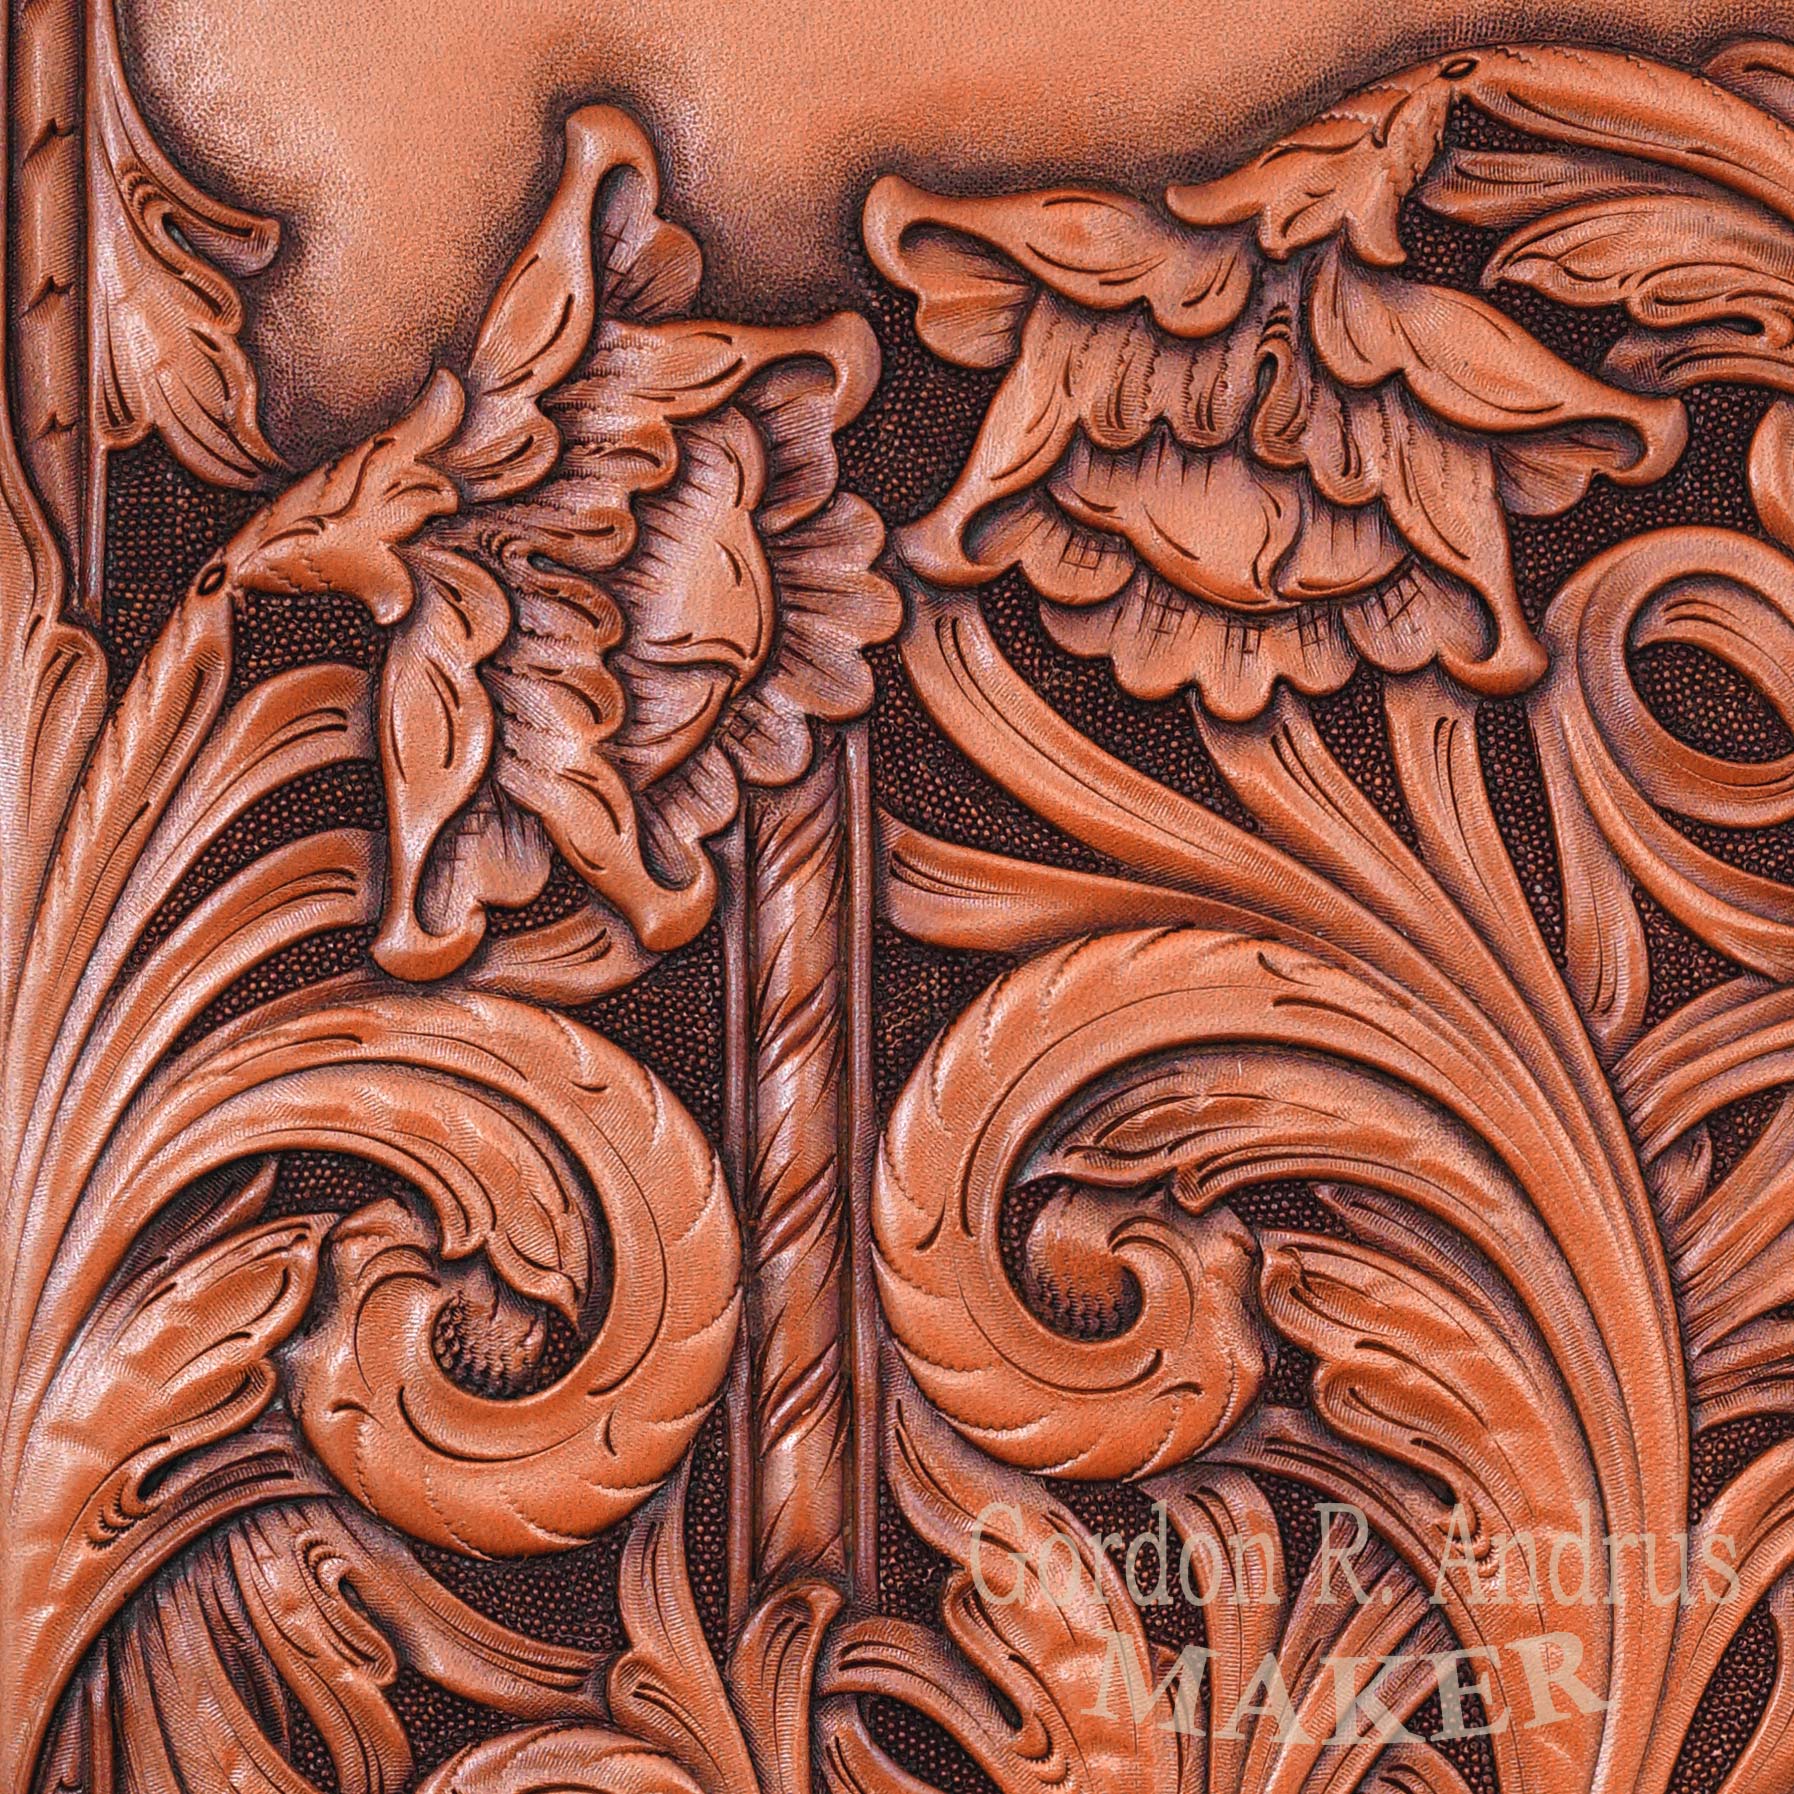
Filling a Boot Top Layout

Slideshow


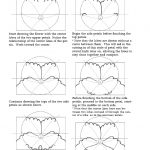
Drawing the Basic Acanthus Leaf
This post is excerpted from my book, “Drawing Floral Patterns For Leather Tooling”
The following drawings illustrate
the skeletal lines within the various
shapes that we draw, starting with the
most basic leaf and progressing to complex
structures like acanthus leaves, scrolls,
and flowers.
The simple leaf in the drawing here
shows how the leaf tapers to blend into
the skeleton. This is the way that skeletal
lines work in a nicely flowing layout.
They are in the center of the various structures
in the drawing and keep things moving
smoothly.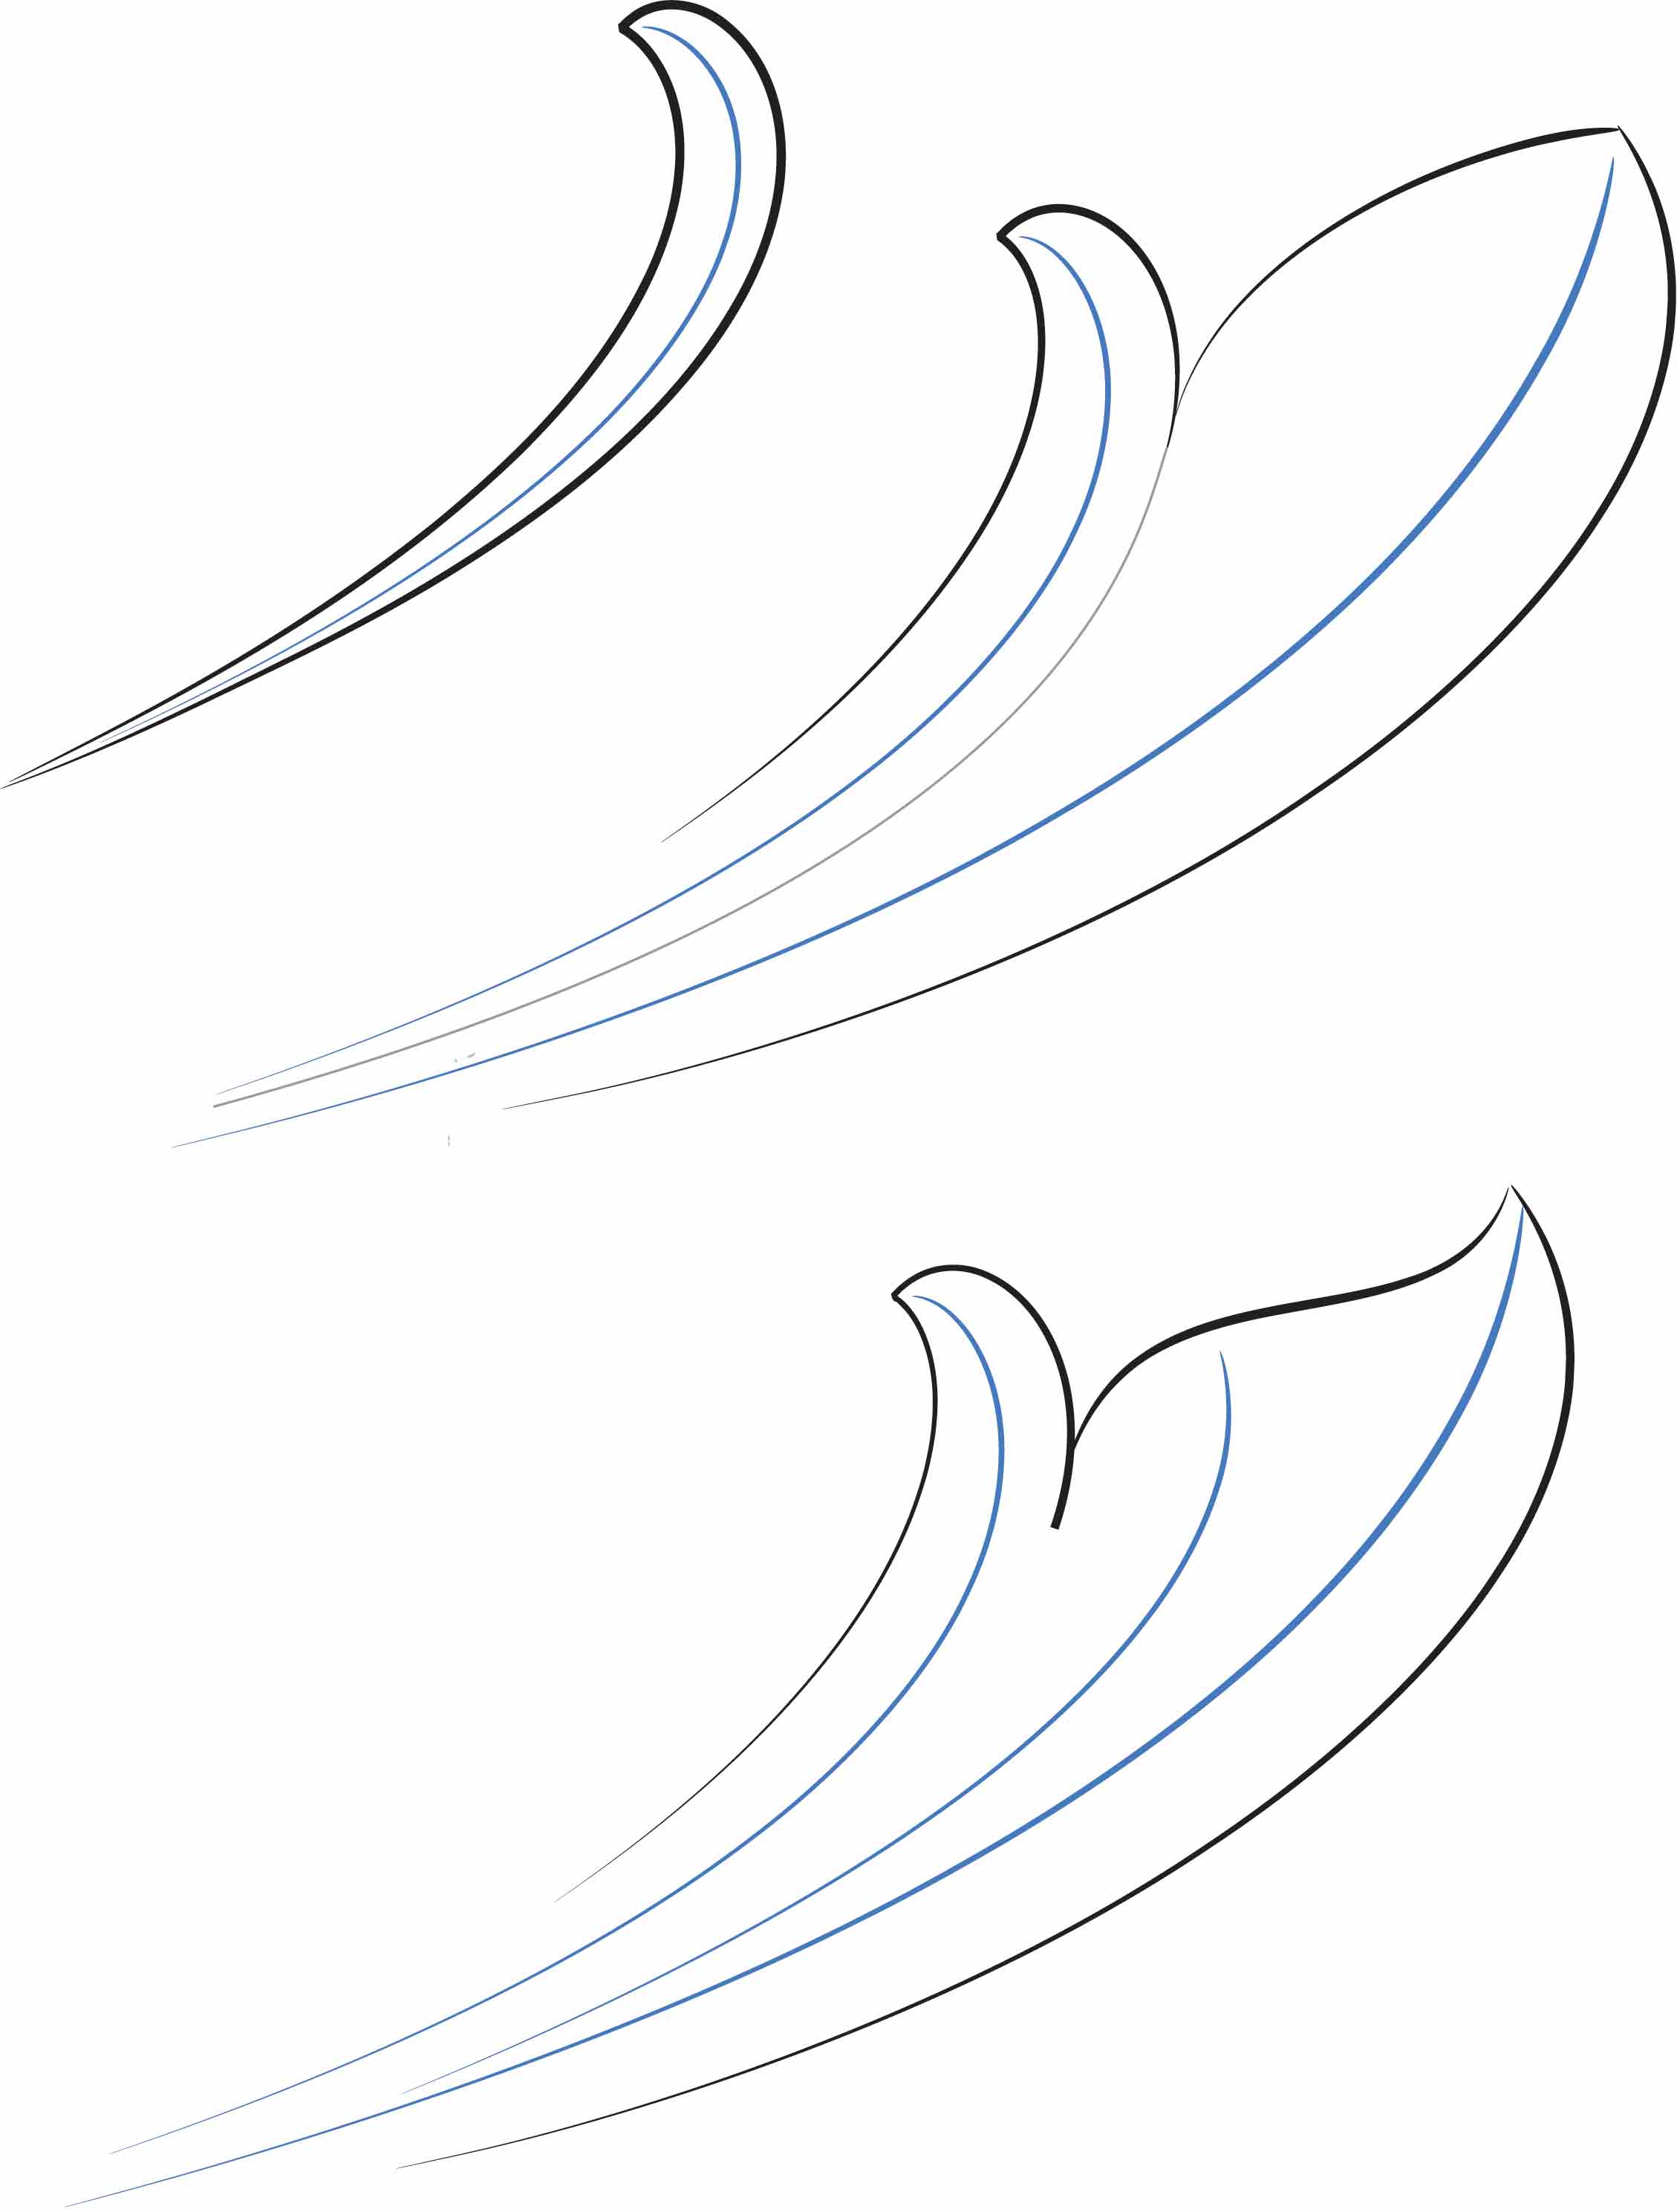
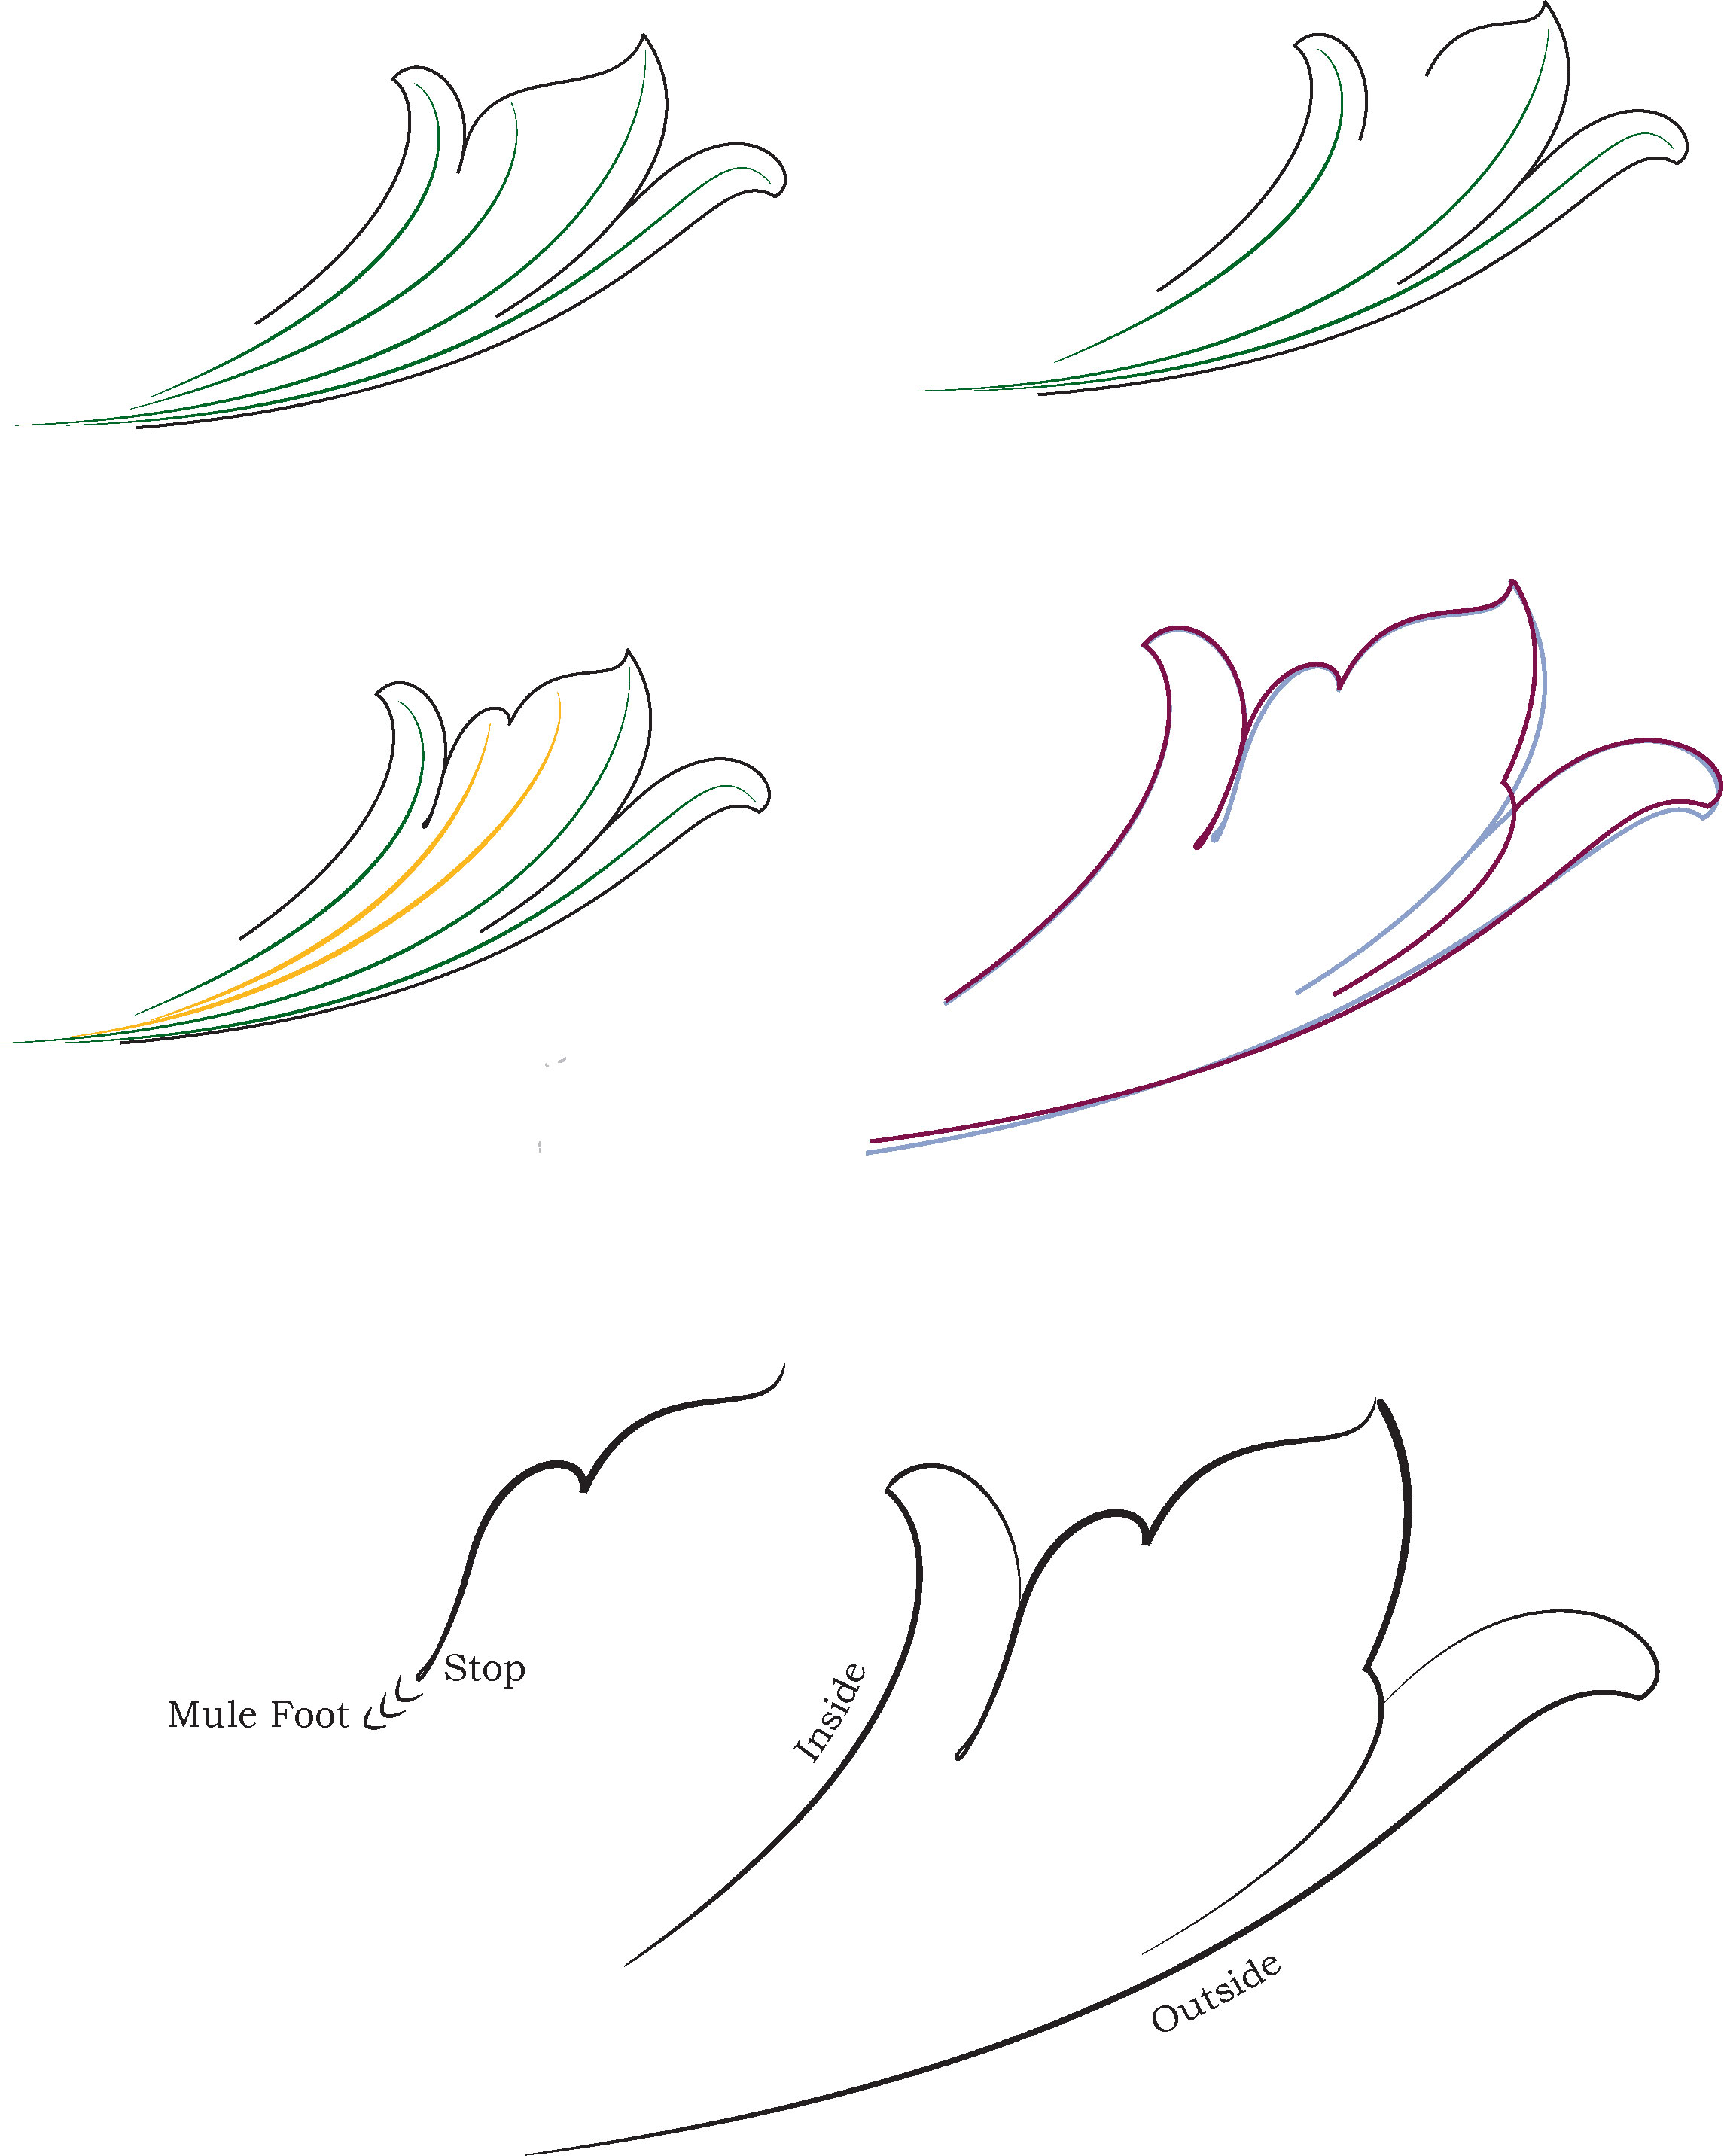
In the next, more complex leaf there
are two skeletal lines, and in the next leaf
there are three. The third line descends
from the lobe that is formed by the S curve
at the top. Knowing that the skeletal line
is there, where the swelling of this lobe is
at its fullest, we are able to keep things
balanced.
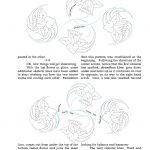
As will be seen in the layouts presented
later, most of these lines don’t get
drawn in when drawing a layout pattern.
However it is important to know that they
are there. These lines form the composition
beneath the big picture.
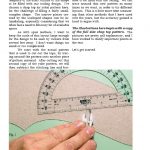
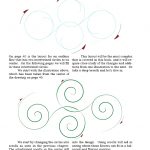
For the purpose of this blog post I want to make a suggestion that you get a tracing pad, print out these images and trace the lines. -But- When doing this I suggest that you concentrate on the dimensions of each part relative to the other parts. Try tracing the little thumb, or simple leaf and then turn the tracing to see how many times its length will go into the the S curve at the top of the combined leaf. Concentrate on the size and sweep of the curves in the S curve. The curve at the tip is smaller than the curve that connects the thumb leaf. While tracing look to see how each line relates to the skeletal lines.
The point is, it is not enough to make the right number of bumps, curves and tapers. Each part needs to be in the right proportion to every other part.
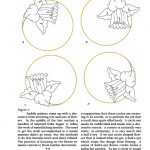
It is perfectly acceptable to trace like this for the purpose of learning how it feels to draw certain shapes. If you practice enough you will develop muscle memory for the shapes. If you don’t gain muscle memory you simply won’t be able to draw floral designs. So develop the discipline to practice when you are not trying to work on an actual project.
When you can draw the basic shapes that you want to use in your patterns, then you will be ready to take on the much more complex task of putting them together in a layout.
Generalized Guide to Needle, Thread, and Awl Sizing for Hand Stitching
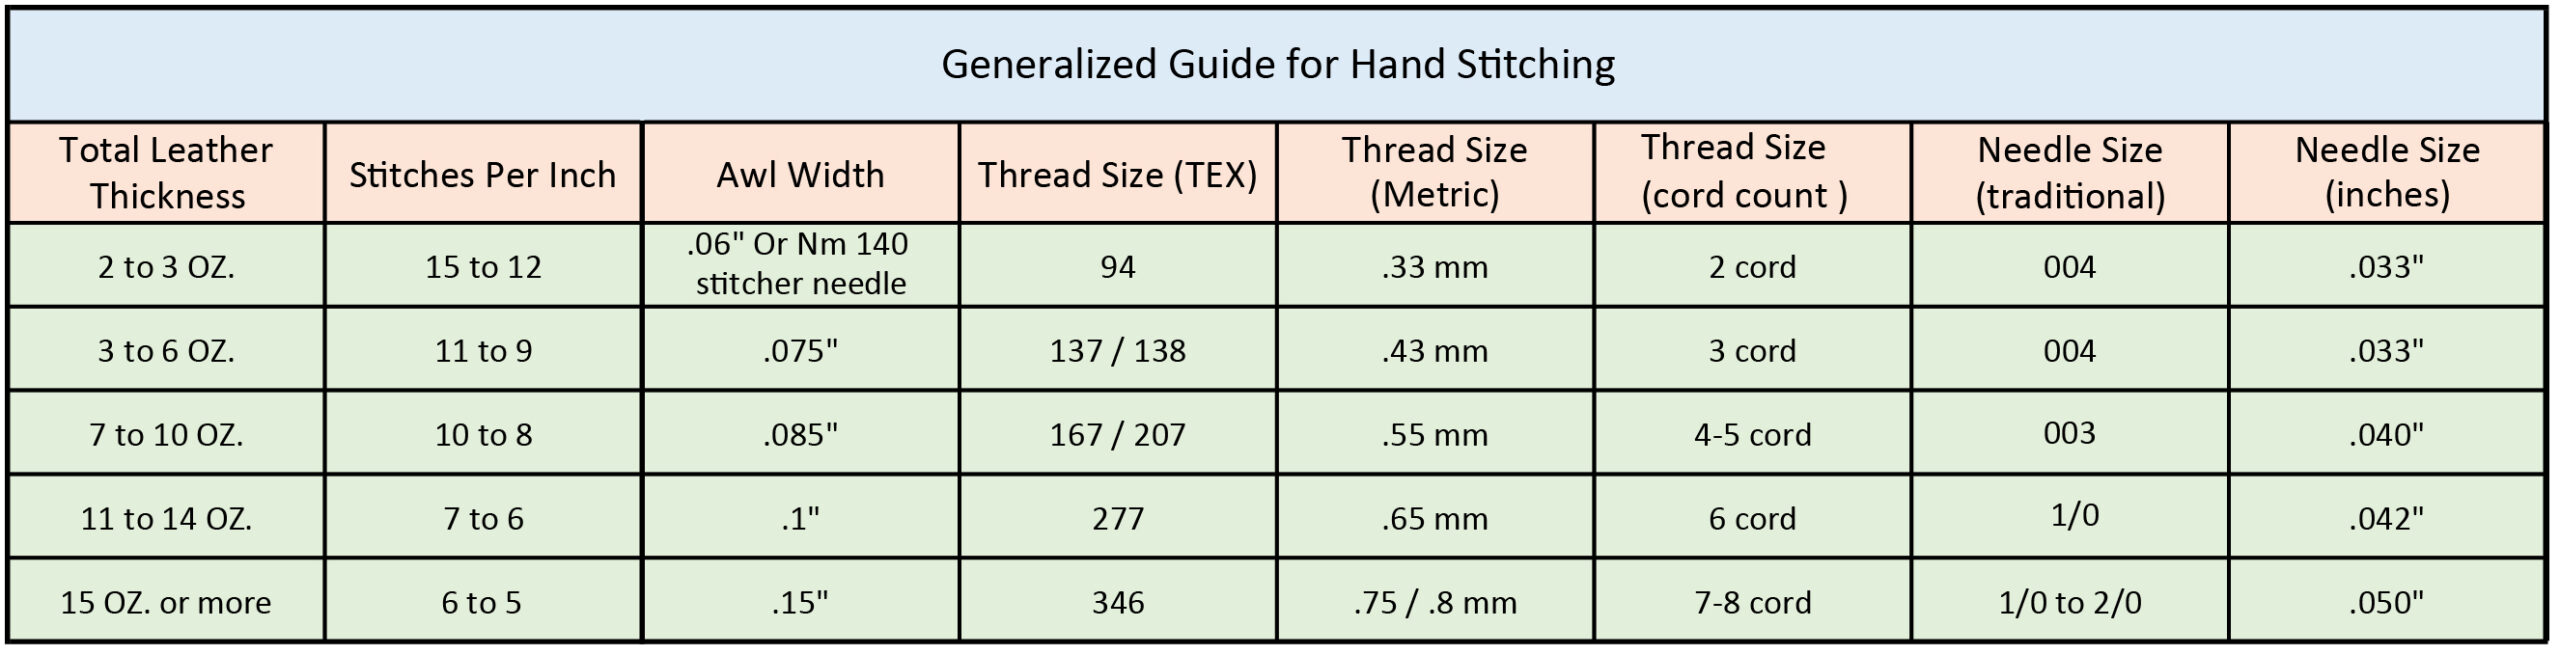
As the title states, this is a generalized guide. It is based on traditional best practices for handwork. Some of the sizes here may be difficult to find sources for. Thread comes from worldwide sources and varies in size. Different awl widths are notoriously difficult to find. Style variation will have a big effect on some of these sizing choices. At the time of this writing large stitches with wide flat braided threads are in vogue. This guide is still useful. If you proceed by choosing your stitches per inch length first, rather than the leather thickness.
Excerpts from My Book
I prepared a preview of several pages from within my book “Drawing Floral Patterns for Leather Tooling.” Please leave a comment, or email if you have questions. The book can be purchased at my store on this site. Be sure to register so you can be notified of future posts. Thanks for checking in, and please enjoy!

Swivel Knife 101
Greater Dimension in Leather Tooling — Use of the Back Beveler Stamp
Hand Stitching, Revival of an Ancient Skill.